To age new wood quickly, start by cleaning and lightly sanding it for a smooth surface. Apply a stain in rich, weathered shades like walnut or espresso, then wipe off excess for depth. Use tools like a hammer or chisel to add dents, scratches, and gouges, focusing on edges and corners to mimic natural wear. Finish by lightly sanding and sealing with a matte or satin topcoat for a convincing vintage look—your secret to instant aged wood lies just ahead.
Key Takeaways
- Sand the wood lightly to remove gloss and create an even surface for stain absorption.
- Apply a dark stain like walnut or espresso generously, then wipe off excess for rich color.
- Use tools such as a hammer or chisel to create dents, scratches, and gouges in high-wear areas.
- Add subtle aging effects by applying watered-down stain or paint, then quickly wipe for a weathered look.
- Seal with a matte or satin finish to protect the aged appearance and enhance the vintage effect.
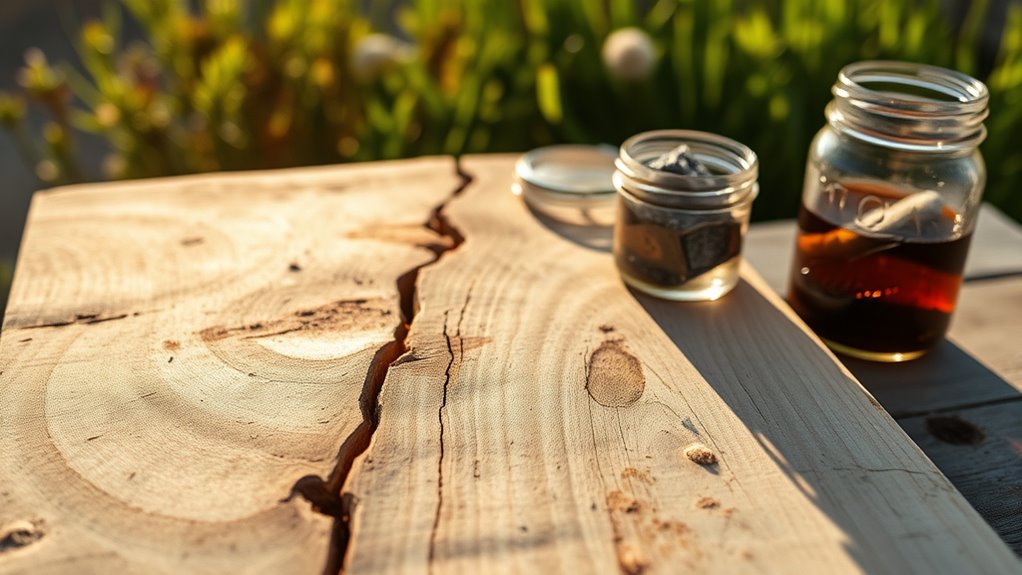
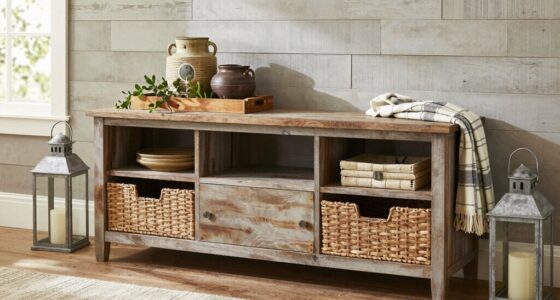
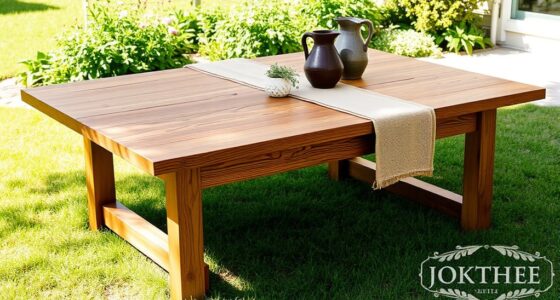
If you want your new wood to look aged and full of character, the process is simpler than you might think. You don’t need to wait years for natural wear and tear — with some basic techniques, you can achieve a vintage look in just an afternoon. The key is understanding how to use wood staining and distressing techniques to simulate the effects of age and use. First, start with clean, smooth wood. Sand it lightly to remove any gloss or rough spots, creating a good surface for the stain to penetrate evenly. Once your wood is prepped, choose a stain color that mimics aged wood—darker shades like walnut or espresso often work well for a weathered look. Apply the stain generously with a brush or rag, working in the direction of the grain, and then wipe off the excess to reveal a rich, deep hue. Don’t be afraid to layer different stain colors, dabbling with a lighter or darker shade to add depth and variation.
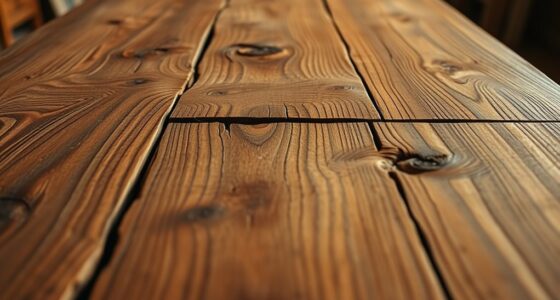
Now, to truly make your wood look aged, distressing techniques are essential. These methods mimic natural wear and tear, giving your piece that authentic vintage charm. Start by using tools like a hammer, chisel, or even a screwdriver to create small dents, scratches, and gouges. Be strategic—focus on edges, corners, and areas that would naturally experience more friction or impact over time. After distressing, you can enhance the weathered appearance by applying a watered-down stain or a thin layer of paint, then quickly wiping it away, leaving subtle discoloration and uneven tones. This technique adds depth and makes the surface look more naturally aged. To simulate the look of worn finishes, you can also sand lightly over certain areas after staining, especially around edges and high-traffic spots, exposing lighter layers underneath. This gives the illusion of long-term wear. Additionally, understanding the impact of contrast ratio can help you achieve a more authentic aged look by emphasizing shadows and highlights that mimic natural aging.
Finally, seal your project with a matte or satin finish to protect your work and keep the aged look intact. Remember, aging wood is all about layering and adding imperfections — the more natural and varied, the better. With these simple steps and a little patience, you’ll transform fresh, new wood into a piece that looks like it’s been around for decades, all in just a few hours. Whether you’re creating furniture, accents, or a statement piece, mastering wood staining and distressing techniques will give your project that perfect vintage charm.

Konvixon 11PCS Wood Carving Disc Set for 4" or 4 1/2" Angle Grinder, Stump Tool Grinding Wheel Disc with 5/8" Adapter Ring, Woodworking Grinder Attachment for Cutting Shaping Carving Sanding Polishing
【11Pcs Wood Carving Disc Set】: Includes 4 upgraded wood grinding wheels in different shapes (right-angle flat, curved, flat,…
As an affiliate, we earn on qualifying purchases.
As an affiliate, we earn on qualifying purchases.
Frequently Asked Questions
Can Artificial Aging Techniques Replicate Natural Wood Aging Accurately?
You wonder if artificial aging techniques can truly mimic natural wood aging. While these methods trigger chemical reactions that create a weathered look, they often fall short of achieving complete visual authenticity. Natural aging involves complex processes over time, resulting in unique textures and color variations. Artificial methods can get close, but they usually lack the nuanced depth and randomness that genuine aging imparts to wood.
What Safety Precautions Should I Take When Aging Wood With Chemicals?
When aging wood with chemicals, you need to prioritize chemical safety. Always wear protective gear like gloves, goggles, and a mask to prevent skin contact and inhalation of fumes. Work in a well-ventilated area to avoid buildup of harmful vapors. Keep chemicals away from children and pets, and follow the manufacturer’s instructions carefully. Taking these precautions guarantees you age wood safely without risking health issues.
How Long Does the Aged Look Typically Last Before Re-Treatment?
In furniture restoration and DIY projects, the aged look typically lasts about 1 to 3 years before needing re-treatment. Factors like exposure to sunlight, moisture, and general wear influence this longevity. To maintain your aged finish, consider reapplying a protective sealant or stain as needed. Regular touch-ups help preserve the authentic aged appearance, ensuring your project stays beautiful and durable over time.
Does the Type of Wood Affect the Aging Process and Results?
The type of wood does affect the aging process and results. Denser woods with tight grain, like oak or maple, may age more slowly and develop a different patina compared to softer woods like pine. Your wood grain and density influence how the aging solutions react, impacting the final look. So, understanding your wood’s characteristics helps you achieve a more authentic, aged appearance in less time.
Can Aged Wood Be Easily Restored to Its Original Appearance?
Aged wood can often be restored to its original appearance through wood restoration techniques, but the ease depends on the extent of aging and damage. You can use sanding, wood conditioners, or refinishing to restore it. Keep in mind, some aging effects, like deep patinas or cracks, may be difficult to fully reverse. Using proper aging techniques initially helps maintain the aged look while making restoration simpler later.

Eco Wood Treatment 1 US Gallon, Long Lasting, Silvery Patina, Semi-Transparent (2 Pack)
HIGHLY EFFECTIVE – This no-maintenance wood stain will not wear off, will not fade, and will not peel….
As an affiliate, we earn on qualifying purchases.
As an affiliate, we earn on qualifying purchases.
Conclusion
Now that you’ve aged your wood, it’s like giving new life a weathered soul. The surface whispers stories of time, as if it’s been through decades in just a single afternoon. With each knot and grain, your project transforms into a timeless treasure, echoing history and character. Embrace this aged beauty, for it’s more than wood—it’s a declaration to your craftsmanship and patience, ready to stand proudly through the ages.

Romeda 8-Pack Sanding Sponge, Four Grits Per Pack 60/80/120/220, Washable and Reusable Handmade Sandpaper Block, Drywall Sandpaper Blocks for Wooden Drywall Sheetrock and Metal Glazing
【ASSORTED GRIT SANDING BLOCKS】 8 sand blocks, 4 sizes from coarse to ultra-fine sand, 60/80/120/220 grit, 2 blocks…
As an affiliate, we earn on qualifying purchases.
As an affiliate, we earn on qualifying purchases.
Minwax Polycrylic Protective Finish, Clear Matte, 1/2 Pint, 222224444
PROTECT WOOD SURFACES – Minwax Polycrylic Protective Finish protects and adds beauty to your interior wood projects, including…
As an affiliate, we earn on qualifying purchases.
As an affiliate, we earn on qualifying purchases.