
Creating DIY mason jar lights is a simple way to transform your bathroom ambiance. You can customize jars with paint, twine, or decorative stones to match your style. Drill holes in the lids, thread LED string lights inside, and hang or place them where you want soft, cozy lighting. These lights add warmth and personality to your space while being functional and easy to make. Keep exploring to discover more creative tips and ideas for your bathroom decor.
Key Takeaways
- Use mason jars with LED string lights, drilling holes in lids for easy threading and secure placement.
- Incorporate decorative elements like paint, stones, or twine inside jars for personalized style.
- Hang or mount jars strategically above mirrors, shelves, or countertops for ambient lighting.
- Select soft, warm-toned lights to create a cozy and relaxing bathroom atmosphere.
- Adjust placement and lighting intensity to enhance decor and transform the overall bathroom ambiance.

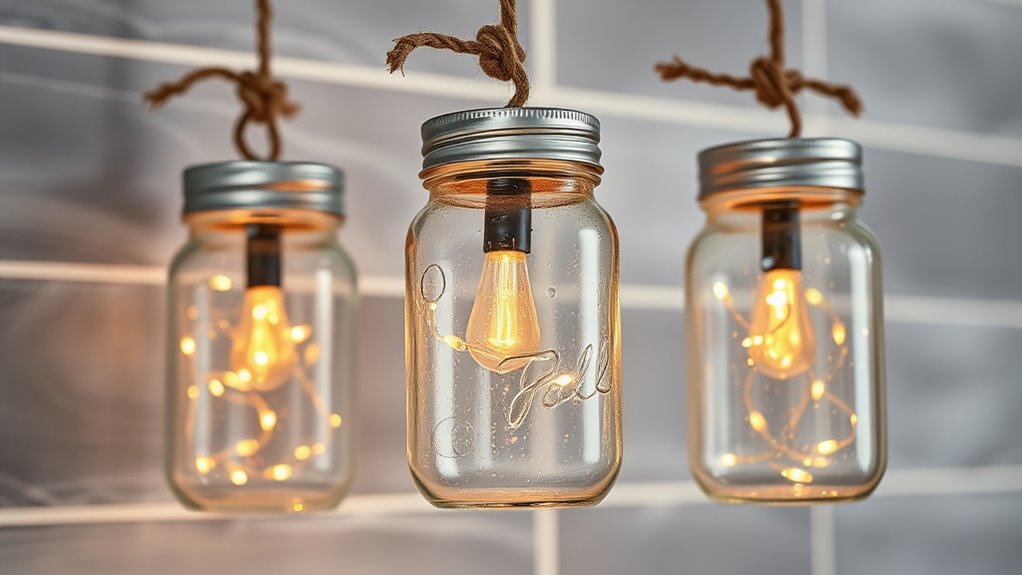
Creating your own mason jar lights is a simple and rewarding way to add a cozy, personalized touch to your space. When you craft these lights, you’re not just installing a fixture—you’re shaping the lighting ambiance of your bathroom. These DIY projects transform ordinary jars into charming, functional decor pieces that make your space feel warm and inviting. Mason jar lights work perfectly as soft ambient lighting, creating a relaxed atmosphere where you can unwind after a long day. They also serve as a creative decor element that reflects your style, whether you prefer rustic farmhouse, vintage, or modern minimalist.
Create cozy, personalized bathroom ambiance with DIY mason jar lights that reflect your unique style.
The process begins with gathering your materials. You’ll need mason jars, LED string lights, a drill, and some decorative touches if you want to customize your jars further. Drilling holes in the lids allows you to thread the string lights through, making the jars glow from within. This step is straightforward but requires caution—use a drill bit suitable for glass and go slowly to avoid cracking. Once the holes are in place, you can insert the lights and secure them, ensuring that the wiring is tidy and safe. Incorporating data analytics in your planning can help you determine the best placement and lighting intensity for your bathroom.
Installing your mason jar lights in your bathroom is where the magic really happens. Hang or mount the jars in strategic spots—above the mirror, along shelves, or even as a centerpiece on the countertop. Because LED lights emit minimal heat, you don’t have to worry about heat buildup or safety issues, making them ideal for bathroom use. The soft glow they emit enhances the lighting ambiance, providing enough light to see while maintaining a soothing environment. These jars can be dimmed or turned off easily, giving you control over your bathroom’s mood.
Adding personal touches like paint, twine, or decorative stones inside the jars elevates your creative decor. You might choose frosted paint for a softer glow or fill the jars with seasonal accents to keep your decor fresh throughout the year. The beauty of DIY mason jar lights is that they’re customizable—you’re in control of the size, placement, and embellishments. They’re perfect for creating a statement wall or accent lighting that makes your bathroom feel uniquely yours.
In the end, making your own mason jar lights isn’t just about the final look; it’s about the experience of crafting something meaningful for your home. These lights blend functionality with style, offering a simple way to improve your bathroom’s lighting ambiance while showcasing your creative decor skills. With just a few supplies and a little effort, you turn basic jars into a charming lighting feature that transforms your space into a cozy retreat.

Brightown 12 Pack LED Fairy Lights Battery Operated String Lights – 7ft 20LED Waterproof Silver Wire Firefly Starry Moon Lights for DIY Crafts Wedding Table Centerpieces Party Ramadan Decorations
【 12 Pack Battery Operated LED Fairy Lights 】- Powered by 2 CR2032 batteries (included), the 7 feet…
As an affiliate, we earn on qualifying purchases.
As an affiliate, we earn on qualifying purchases.
Frequently Asked Questions
Can DIY Mason Jar Lights Be Used Outdoors?
You can definitely use DIY mason jar lights outdoors, but you’ll need to consider outdoor weatherproofing to protect them from rain and humidity. Using weatherproof seals and appropriate wiring helps ensure durability. Additionally, solar power integration makes them more practical and eco-friendly for outdoor use. Just make sure the jars are well sealed and placed in areas with ample sunlight, so your mason jar lights stay beautiful and functional outside.
What Safety Precautions Are Needed for Electrical Wiring?
When working with electrical wiring, you need to prioritize electrical safety and follow proper wiring guidelines. Always turn off power before starting, use insulated tools, and make sure your connections are secure. Avoid overloading circuits and use weatherproof materials if the lights are outdoors. If you’re unsure, consult a professional electrician. Following these safety precautions keeps you safe and ensures your DIY project functions reliably.
Are LED Bulbs Suitable for Mason Jar Lighting?
You’ll find LED bulbs are highly suitable for mason jar lighting because of their LED compatibility. They’re energy-efficient and produce less heat, making them safer for enclosed spaces like jars. Plus, LED bulbs offer excellent bulb longevity, meaning you won’t need to replace them often. Just make certain the LED bulb size fits your jar’s socket, and you’ll enjoy bright, long-lasting illumination that’s perfect for your DIY project.
How Long Does the Installation Process Typically Take?
Ever wonder how long it takes to bring your vision to life? The installation timeline varies based on the complexity level of your project, but typically, it takes about 30 minutes to an hour. If you’re experienced, expect a smoother, quicker process. For beginners, allow extra time for preparation and troubleshooting. With patience and attention, you’ll enjoy your custom lighting in no time, transforming your space beautifully.
Can These Lights Be Dimmed or Adjusted?
You might wonder if these lights can be dimmed or adjusted. Luckily, many fixtures offer dimming options, giving you brightness control to set the perfect ambiance. Check if the bulbs or switches support dimming features, as some models come with built-in brightness control. If not, you can upgrade to dimmable bulbs or install a compatible dimmer switch to customize your lighting experience effortlessly.

National Artcraft Farmhouse-Style Plug-In Mason Jar Hanging Pendant Lamp Kit – Mason Jar and Bulb NOT INCLUDED
Create your own hanging Farmhouse-style Mason jar pendant light with this easy to use kit.
As an affiliate, we earn on qualifying purchases.
As an affiliate, we earn on qualifying purchases.
Conclusion
With these DIY mason jar lights, your bathroom transforms into a cozy oasis, shining brighter than a thousand stars. Just like a painter adds vibrant colors to a blank canvas, you’ve added a personal touch that reflects your style. So, grab your jars and let your creativity light the way. Before you know it, you’ll have a space that feels warm and inviting, proving that a little sparkle can turn any room into a shining masterpiece.
Brightown 12 Pack LED Fairy Lights Battery Operated String Lights – 7ft 20LED Waterproof Silver Wire Firefly Starry Moon Lights for DIY Crafts Wedding Table Centerpieces Party Ramadan Decorations
【 12 Pack Battery Operated LED Fairy Lights 】- Powered by 2 CR2032 batteries (included), the 7 feet…
As an affiliate, we earn on qualifying purchases.
As an affiliate, we earn on qualifying purchases.

Farmhouse Decor Apothecary Jar Set,Mason Jar Bathroom Vanity Storage Organizer Canister-Qtip Holder Plastic Acrylic Jar for Cotton Swabs, Cotton Pad, Floss Pick, Paper Clip, Hair Clip (4 Pack, Bronze)
✅CUTE FARMHOUSE DECOR: The apothecary jar set will be a fun and beautiful addition to your home. And…
As an affiliate, we earn on qualifying purchases.
As an affiliate, we earn on qualifying purchases.