Making your own soap can be a rewarding process that combines creativity with careful safety practices. As you explore the steps involved, you’ll learn how to combine ingredients precisely and create personalized, eco-friendly bars. Proper preparation and attention to detail are essential for success, but there’s more to discover about the techniques and tips that can help you craft high-quality soap. Ready to start your homemade soap journey?
Key Takeaways
- Gather and organize all ingredients, tools, and safety gear before starting to ensure a smooth soap-making process.
- Understand the saponification process and measure ingredients accurately for safe and high-quality soap.
- Mix oils, lye solution, fragrances, and colorants thoroughly, then pour into molds at the correct temperature.
- Allow soap to cool and cure in a dry, well-ventilated space for proper solidification and longevity.
- Choose appropriate molds for easy unmolding and customize soaps with fragrances, colors, and additives for a personal touch.

PIUH Deluxe Soap Making Kit for Soap Making, DIY Soaps Making Full Set Kits Includes Soap Melter, 4 lb Soap Base, 8 Essencial Oils, Silicone Loaf Molds & Scraper, Cutters, 8 Dyestuffs for Adults Gift
Deluxe Full Set Kit: Get the complete soap making experience with a whopping eight essential oils and dyes…
As an affiliate, we earn on qualifying purchases.
As an affiliate, we earn on qualifying purchases.
Gathering Your Supplies and Ingredients
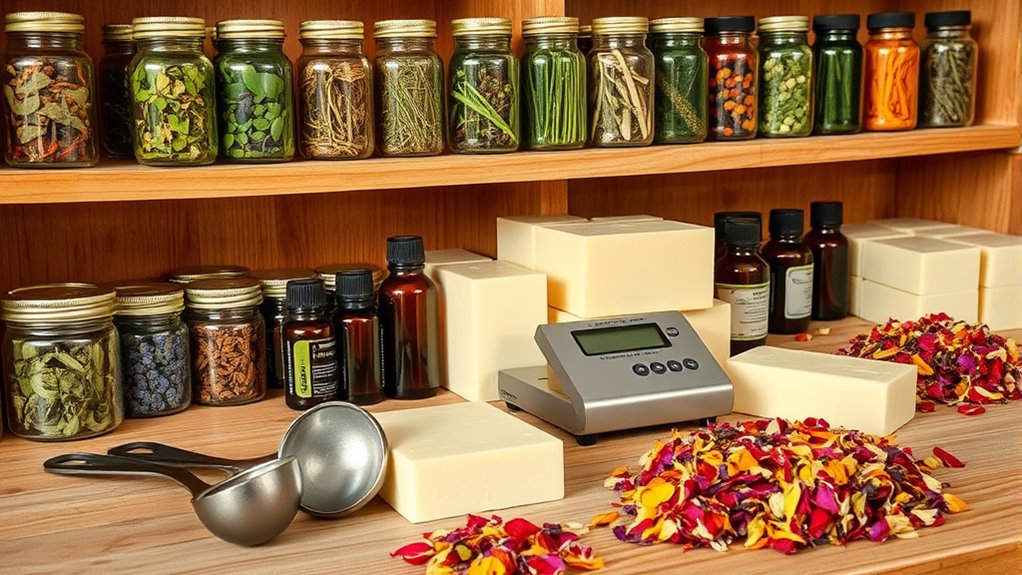
Before you begin making soap, you need to gather all the necessary supplies and ingredients. Start by selecting your base ingredients, like oils and lye, and don’t forget to have safety gear such as gloves and goggles. Proper calibration of your tools ensures accurate measurements and successful soap batches. Essential oils are key for adding fragrance, so choose your favorites to customize your soap’s scent. Colorants are also important—they help give your soap an appealing look, whether you prefer natural herbs or synthetic dyes. Make sure to have small containers or bottles for your oils and colorants, and keep everything organized for easy access. Having all your supplies ready beforehand guarantees a smooth process and reduces the risk of missing anything mid-creation. Proper preparation sets the stage for successful soap making.

LERYKIN Rectangular Soap Mold Kit with Cutter- 42oz Flexible Silicone Loaf Soap Mold with Wood Box, Stainless Steel Wavy & Straight Scraper for Homemade Craft Soap Making Supplies
COMPLETE SOAP MAKING ACCESSORY & VERSATILE USE – LERYKIN Rectangular Soap Mold is ideal for beginners, children and…
As an affiliate, we earn on qualifying purchases.
As an affiliate, we earn on qualifying purchases.
Understanding the Soap Making Process
Understanding the soap making process starts with grasping saponification chemistry, where fats and lye react to form soap. You’ll also need to know which ingredients are safe to use and how to handle them properly.
Safety precautions are essential to guarantee your soap turns out well and you stay protected.
Saponification Chemistry Basics
Saponification is the chemical reaction that transforms fats and oils into soap and glycerol. To do this successfully, you need to understand lye calculation, which determines the correct amount of sodium hydroxide (lye) needed. Proper lye calculation guarantees your soap has the right consistency and pH. Typically, soap pH ranges from 9 to 10, making it safe for skin. Here’s a quick overview:
| Ingredient | Role | Key Consideration |
|---|---|---|
| Fats/Oils | Base for soap | Type affects hardness |
| Lye | Saponification agent | Accurate lye calculation |
| Water | Dissolves lye | Too much can weaken soap |
Knowing these basics helps you control the saponification process and produce high-quality homemade soap. Understanding the soap making process is essential for beginners to achieve consistent results.
Ingredients and Safety
Getting the ingredients right is essential for safe and successful soap making. Use high-quality oils, lye, and distilled water to guarantee safety and consistency. When selecting essential oils, consider their skin benefits and scent strength, adding them carefully during the mixing process. Fragrance blending allows you to create unique scents, but always test small batches to avoid overpowering aromas or allergic reactions. Wear protective gear like gloves and goggles, and work in a well-ventilated area to stay safe from fumes. Measure ingredients precisely to maintain proper saponification. Keep a detailed recipe log for future reference. Understanding the importance of ingredient accuracy and safety precautions helps you craft beautiful, fragrant soaps without risk. Additionally, being aware of anime movies can inspire creative themes and storytelling elements for your soap designs.

Majestic Pure Essential Oil with Glass Dropper – 100% Pure and Natural – Essential Oils for Diffuser, Aromatherapy, Soap and Candle Making, Lavender Essential Oil, Lavender Oil, 4 Fl Oz
100% PURE & NATURAL LAVENDER OIL – Majestic Pure Blends oils are exactly that! Many oils being sold…
As an affiliate, we earn on qualifying purchases.
As an affiliate, we earn on qualifying purchases.
Preparing Your Workspace Safely
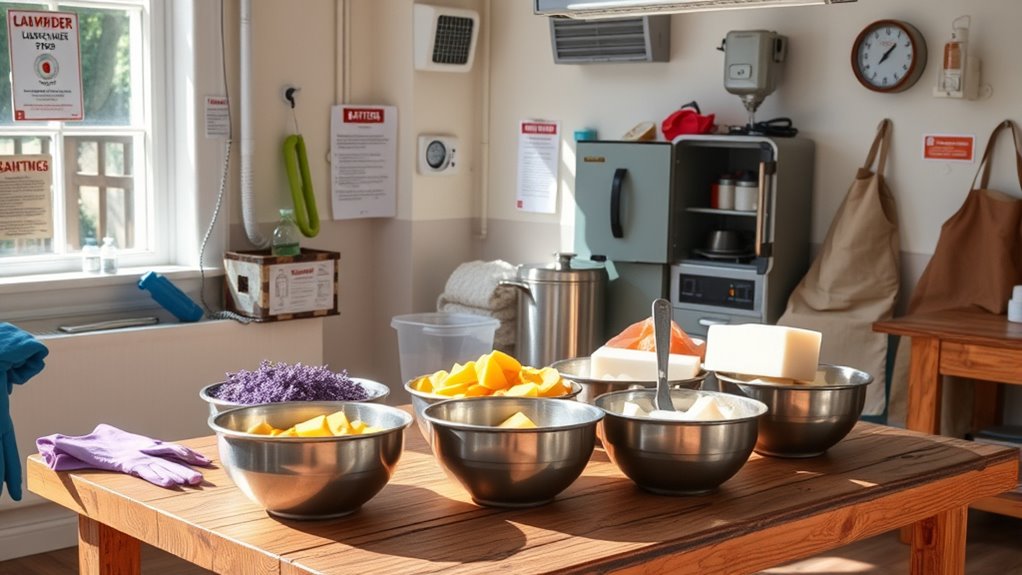
Before you start making soap, it’s essential to prepare your workspace to guarantee safety and efficiency. First, ensure good ventilation safety by working in a well-ventilated area to avoid inhaling fumes from lye or fragrances. Keep windows open or turn on exhaust fans to improve airflow. Additionally, incorporating sustainable practices like using eco-friendly cleaning supplies can help minimize your environmental impact during soap making.
Next, organize your workspace by clearing clutter and designating separate zones for measuring, mixing, and cleaning. Store all ingredients and tools within easy reach, and keep hazardous materials away from children or pets.
Use spill-proof containers for liquids and cover surfaces with protective mats to prevent damage. Proper workspace organization minimizes accidents and helps you work smoothly.
Taking these steps ensures a safer environment, making your soap-making process more enjoyable and less stressful.

DEWALT DPG82-11 Concealer Clear Anti-Fog Dual Mold Safety Goggle, Clear Lens, 1 Pair
DEWALT ToughCoat hard coated lens provides tough protection against scratches.
As an affiliate, we earn on qualifying purchases.
As an affiliate, we earn on qualifying purchases.
Mixing and Combining Ingredients
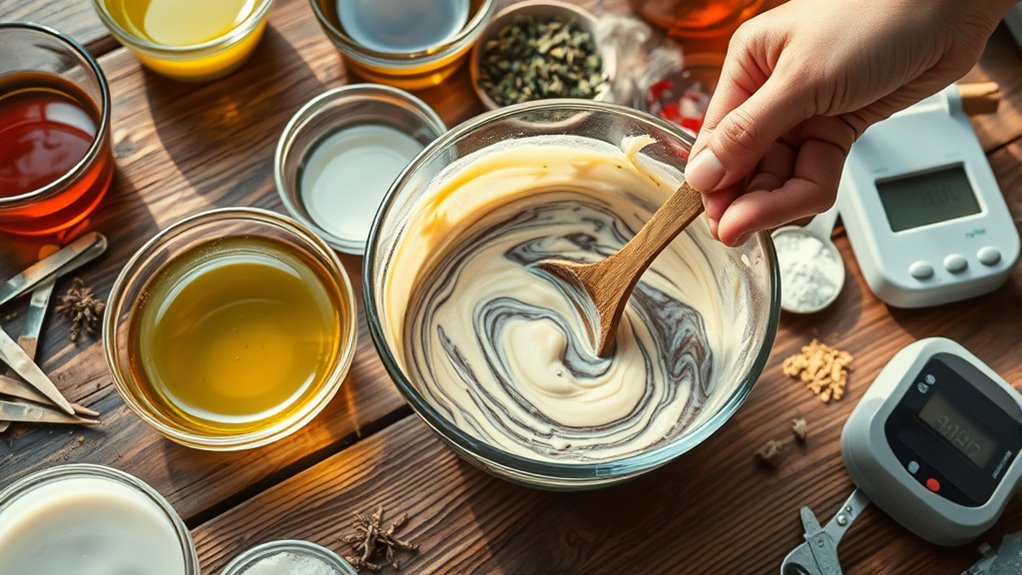
Once you have all your ingredients measured and ready, it’s important to mix them carefully to guarantee a thorough and even combination. Start by slowly blending your melted oils and lye solution, stirring continuously to prevent separation.
When adding fragrance, choose a scent that complements your soap’s theme; a few drops go a long way. Mix in your fragrance gradually, ensuring it disperses evenly throughout the mixture.
For color blending, add your chosen dye sparingly, stirring well after each addition to achieve a uniform hue. Consistent stirring helps prevent streaks or uneven patches.
Pay close attention to the consistency; you want a smooth, homogeneous mixture that’s ready for pouring. Proper mixing ensures your soap will have a balanced scent and vibrant, consistent color.
Additionally, maintaining a proper mixture consistency during blending is essential to achieve a professional-looking soap with a uniform texture.
Pouring and Molding Your Soap
When pouring your soap, use steady, even motions to avoid air bubbles and spills. Choose molds that suit your design and guarantee they’re lined or prepared for easy removal. Once poured, let the soap sit undisturbed until it fully solidifies to achieve the best results. Reflecting on life lessons, patience and precision during pouring can lead to a more satisfying outcome.
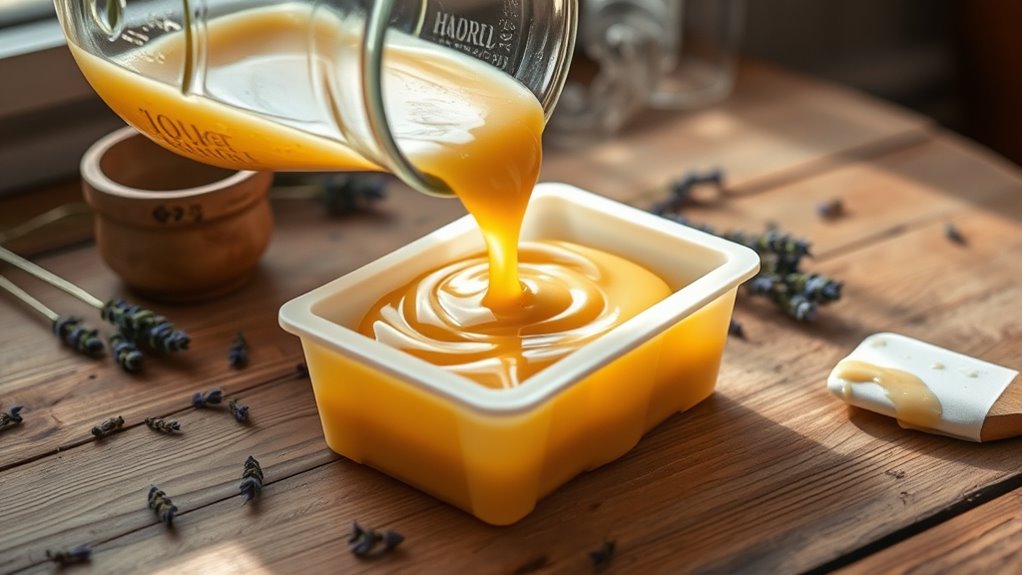
Proper Pouring Techniques
Pouring your soap mixture into molds requires attention to technique to guarantee a smooth, even surface. To achieve this, focus on proper pouring techniques that support the right soap consistency. Keep the pour steady and slow to prevent air bubbles and uneven layers. Use a spatula or spoon to guide the soap gently into corners, avoiding splashes. Additionally, maintaining a consistent pouring speed helps ensure a uniform finish. Aim to pour from a height that minimizes splashing but maintains control. If your soap starts to thicken, pause and stir gently to restore the flow. Remember, patience is key—rushing can create imperfections. Achieving a flawless finish depends on your control and understanding of soap consistency during pouring. With practice, you’ll master pouring techniques that result in beautiful, professional-looking soap every time.
Choosing Molds Carefully
Choosing the right molds plays a vital role in achieving a professional finish for your homemade soap. Your mold material selection impacts easy removal and clean-up, so options like silicone, plastic, or metal each have benefits.
Silicone molds are flexible and non-stick, making unmolding simple. Plastic molds are affordable and versatile for various shapes.
Consider decorative mold designs to add visual appeal—intricate patterns or themed shapes can elevate your soap’s look.
Make certain your molds are sturdy enough to withstand the soap’s weight without cracking or warping. Before pouring, lightly grease the mold if needed, especially for intricate designs.
Additionally, selecting molds compatible with sound healing science can enhance the relaxation experience associated with your soap, creating a multisensory product that promotes well-being.
Carefully choose molds that match your style and soap type to create beautiful, well-formed bars every time.
Ensuring Soap Solidifies
To guarantee your soap solidifies properly, it’s essential to pour the mixture at the right temperature into prepared molds. Proper temperature control prevents uneven curing, cracks, or unsetting soap. Using durable materials suited for kitchen use can help ensure the molds maintain their shape during cooling. Choose your molds carefully to ensure even cooling and easy removal. Monitor the temperature closely—typically, soap should be poured between 110-130°F (43-54°C)—to avoid premature solidification or melting. Once poured, allow the soap to cool undisturbed in a stable environment. Proper mold selection, such as silicone or plastic, helps in easy unmolding and maintains the soap’s shape.
Curing and Storing Your Handmade Bars
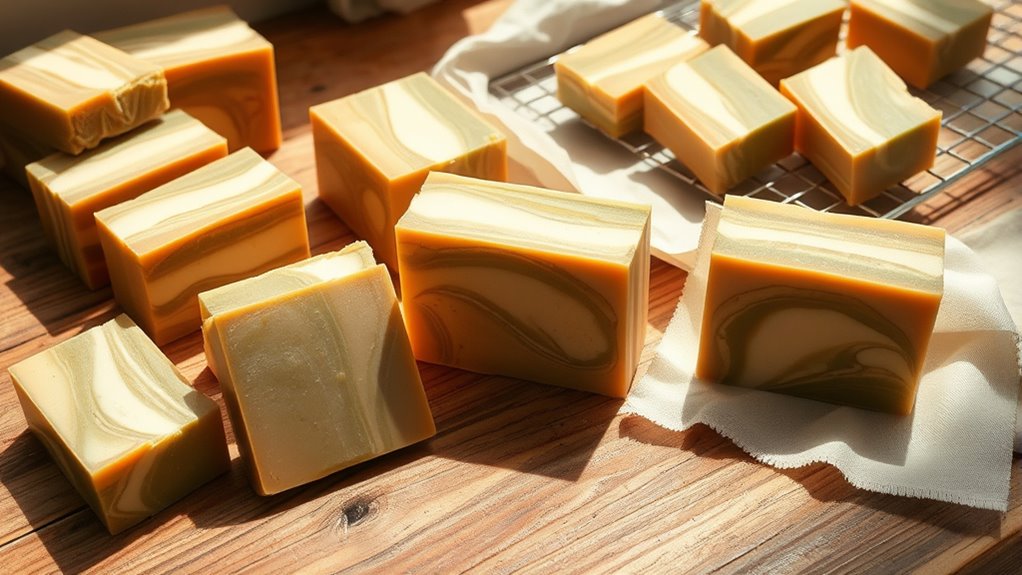
Have you ever wondered why proper curing and storage are essential for your homemade soap? The key is the cure time, which allows excess moisture to evaporate, resulting in a harder, longer-lasting bar.
During this period, avoid using or wrapping the soap to prevent trapping moisture. Once cured, store your soap in breathable storage containers, like cardboard boxes or paper bags, to promote air circulation.
Proper storage helps maintain the soap’s quality, fragrance, and appearance over time. Keep your bars in a cool, dry place, away from direct sunlight or humidity, which can cause sweating or degradation. Cookies and Privacy ensure your website’s safety and user experience, supporting optimal storage conditions.
Following these steps ensures your soap remains fresh, firm, and enjoyable for as long as possible. Proper curing and storage are fundamental to creating high-quality, durable handmade soap.
Tips for Customizing and Enhancing Your Soaps
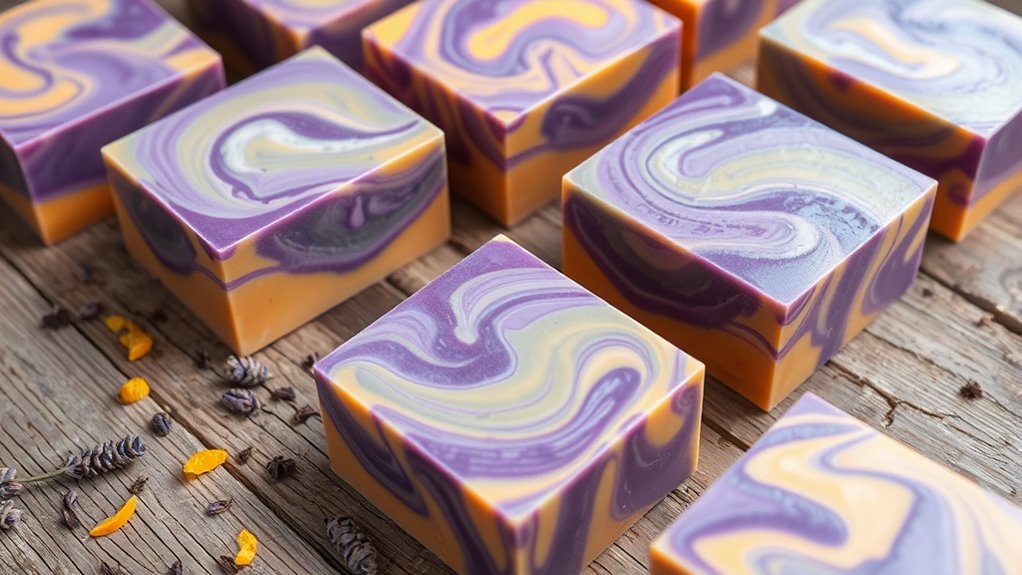
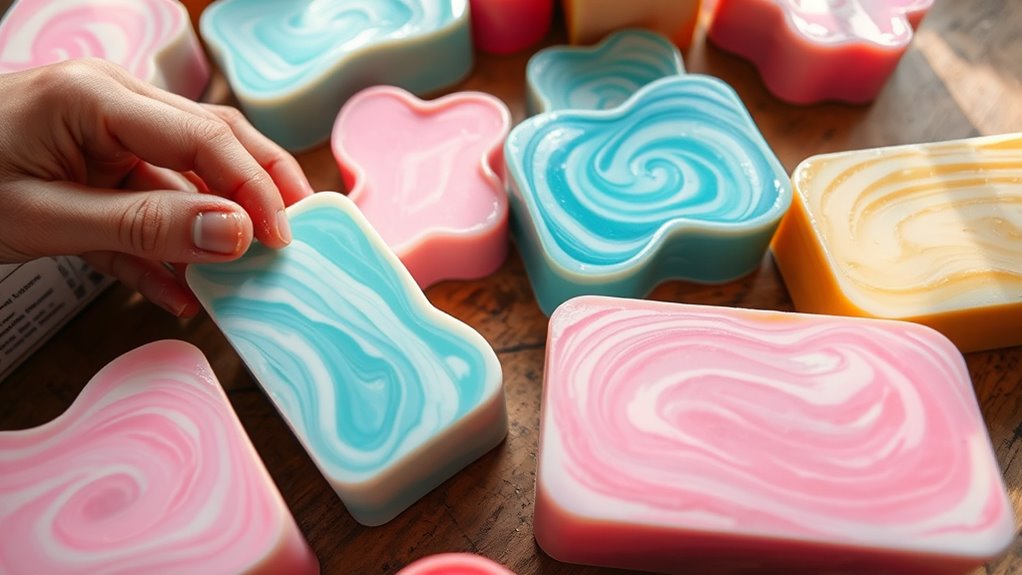
Adding personal touches to your soap can transform a simple bar into a unique masterpiece. By experimenting with fragrance blending, you create scents that evoke emotion and memories. Incorporating emotional expression and personalized aromas with essential oils can deepen the sensory experience. Color customization allows you to craft visually stunning soaps tailored to your style or occasion. Incorporate natural pigments or mica powders for vibrant, eye-catching hues. Consider layering different colors or swirling them for artistic effects that captivate. Use essential oils and fragrance oils to craft complex, personalized aromas. Adding dried herbs, flower petals, or exfoliants can elevate texture and visual appeal. These enhancements make your soap not just functional but a reflection of your creativity and personality, ensuring each bar is truly one-of-a-kind.
Frequently Asked Questions
Can I Make Soap Without Using Lye?
You wonder if you can make soap without using lye, and the answer is yes. You can use lye alternatives like melt-and-pour bases, which eliminate the need for handling dangerous chemicals.
These options still allow you to create soap while ensuring soap preservation without the risks associated with lye. Just follow the instructions carefully, and you’ll be able to craft beautiful, safe soap without direct lye contact.
How Long Does Homemade Soap Last Before Spoiling?
Your homemade soap typically lasts about 6 to 12 months before spoiling, depending on ingredients and storage.
To maximize shelf life and prevent spoilage, store it in a cool, dry place, away from direct sunlight.
Proper drying after use also helps.
Regularly check for changes in smell, texture, or color—these indicate spoilage.
Following these tips guarantees your soap stays fresh and safe for longer.
Are There Natural Alternatives to Synthetic Fragrances?
You’re wondering if natural alternatives to synthetic fragrances exist. Absolutely! You can use essential oil blends to create lovely, fragrant soaps.
Fragrance layering with different essential oils allows you to develop complex, personalized scents without synthetic chemicals. These natural options are safe, eco-friendly, and customizable, giving you control over your soap’s aroma.
Plus, they add therapeutic benefits, making your homemade soap even more special and nourishing for your skin.
What Are Common Mistakes to Avoid in Soap Making?
You want perfect soap, yet common mistakes can trip you up. Avoid rushing soap curing; patience guarantees quality. Be mindful of fragrance allergies, choosing natural scents instead of synthetic fragrances to prevent reactions. Overusing lye can cause skin irritation, so measure carefully.
Skipping thorough mixing leads to uneven soap, while neglecting proper curing results in soft bars. Stay attentive, and your soap will be safe, fragrant, and beautifully crafted.
How Can I Make Soap Suitable for Sensitive Skin?
To make soap suitable for sensitive skin, you should focus on natural ingredient choices that are gentle and nourishing. Avoid harsh chemicals and synthetic fragrances, opting instead for soothing ingredients like aloe vera or oatmeal.
Always conduct skin sensitivity testing before use to prevent reactions. By carefully selecting natural ingredients and testing your soap, you create a gentle product that minimizes irritation and supports sensitive skin health.
Conclusion
Now that you’ve mastered homemade soap making, you’re not just creating soap—you’re crafting tiny miracles of cleanliness and beauty with your own hands! Each bar is a masterpiece, a fragrant work of art that could turn even the grumpiest person into a smiling, squeaky-clean superhero. So go ahead, release your creativity, and watch your soap become the legendary, unstoppable force of freshness that transforms your bathroom into a sanctuary of pure, homemade magic!