

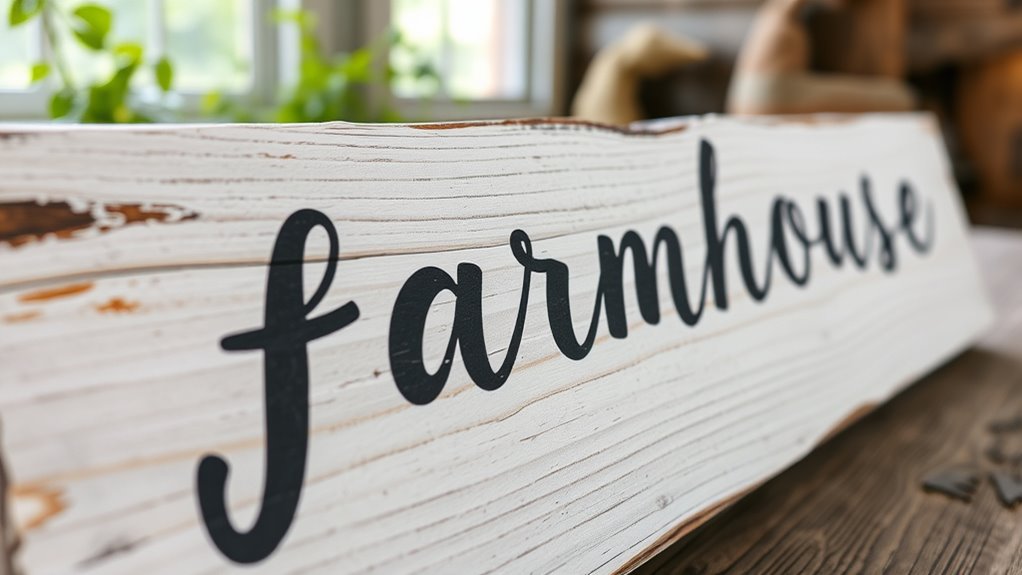
Creating your own farmhouse signage can add a warm, personalized touch to your home decor, but knowing where to start might feel overwhelming. From choosing the right materials to adding decorative details, each step offers opportunities to reflect your style. With some simple supplies and a bit of patience, you can craft a charming piece that enhances your space—yet, the process involves more than just assembling parts. So, let’s explore how to bring your farmhouse sign ideas to life.
Key Takeaways
- Select durable, weatherproof wood and vintage hardware to create a rustic base for your farmhouse sign.
- Transfer your design with stencils or transfer paper, focusing on simple farm motifs or handwritten lettering.
- Use outdoor paints or stains with textured techniques to achieve a rustic, distressed finish.
- Decorate with seasonal accents or charms, and ensure secure mounting with appropriate hardware.
- Seal your sign with multiple coats of weatherproof sealant and mount it securely in a visible, sheltered location.

Home Decor Interchangeable Seasonal Welcome Sign DIY Unfinished Wood Front Door Sign Farmhouse Wall Hanger Plaque Board For Festival Decoration Decoraciones Para Salas De Casa
Replaceable Door Signs-Various graphic symbols, you can change the door signs according to your needs, or it can…
As an affiliate, we earn on qualifying purchases.
As an affiliate, we earn on qualifying purchases.
Gathering Materials and Tools

Before you begin creating your farmhouse sign, it’s essential to gather all the necessary materials and tools. Start with sturdy wood or reclaimed pallets for the base. You’ll also need metal embellishments to add rustic charm, so choose designs that complement your style. Have a selection of brushes, paint, and stencils ready for lettering and decoration. To make sure your sign withstands the elements, pick up weatherproof coatings—these will protect your artwork from rain, sun, and humidity. Don’t forget sandpaper for smoothing surfaces and a drill or nails for assembly. Considering the benefits of homemade juices, incorporating natural finishes or sealants can help preserve your sign’s appearance over time. Having everything on hand before you start streamlines the process and prevents interruptions. Proper preparation guarantees that your farmhouse sign will look great and last for years.

DecoArt Patio Outdoor Paint Set – 24 Starter Colors (2 fl oz Bottles) – Outdoor Weatherproof Permanent Paints for Wood, Terra Cotta & DIY Crafts
24 Essential Outdoor Paint Colors: A complete starter palette of DecoArt Patio Paints — perfect for DIYers, garden…
As an affiliate, we earn on qualifying purchases.
As an affiliate, we earn on qualifying purchases.
Selecting the Perfect Design
When choosing your design, consider which rustic style and theme best match your home’s vibe. Think about color schemes and font choices that enhance readability and complement your decor. Picking the right combination will make your farmhouse sign truly stand out. Additionally, selecting materials that absorb or reflect light in a way that aligns with your overall aesthetic can create a more cohesive look visual harmony.
Rustic Style and Themes
Choosing the right rustic style for your farmhouse signage involves considering natural materials, weathered finishes, and simple, heartfelt designs. Vintage motifs add charm and character, giving your sign an authentic, timeless appeal. Incorporate distressed finishes to enhance the aged look, making your piece feel well-loved and lived-in. Think about incorporating wood with rough edges or reclaimed barn wood for added authenticity. Keep your design straightforward, focusing on rustic elements that evoke warmth and nostalgia. Keep details minimal but meaningful, such as simple farm symbols or handwritten-style lettering. The goal is to create a piece that feels organic and inviting, capturing the essence of farmhouse life. By selecting vintage motifs and emphasizing distressed finishes, your signage will radiate rustic charm effortlessly. Personal development principles like goal setting and self-reflection can help you approach your craft with focus and purpose.
Color and Font Choices
Selecting the right colors and fonts can transform your farmhouse signage into a warm, inviting focal point. Your choice of color palettes sets the mood—soft neutrals evoke calm, while bold hues add character. Font styles influence readability and style; rustic, handwritten fonts create charm, whereas clean, modern fonts offer simplicity. Consider combining complementary colors and fonts to enhance visual appeal. To help visualize, here’s a quick guide:
| Color Palettes | Font Styles |
|---|---|
| Earth tones | Handwritten, script |
| Whites and neutrals | Serif, vintage |
| Pastels | Casual, brush script |
| Dark shades | Bold, block fonts |
Pick a palette and font that reflect your style, ensuring your sign feels both personal and welcoming. Incorporating color theory can further help you choose harmonious combinations that resonate with your farmhouse aesthetic.

TIESOME 40Pcs Mini Metal Rusty Barn Stars, Antique Rustic Decor Craft Accents Two Sizes for Holiday Wall Farmhouse Garden Home DIY
【Creative Craft Element】 Ideal for DIY enthusiasts, these metal stars serve as essential primitive accents for various artistic…
As an affiliate, we earn on qualifying purchases.
As an affiliate, we earn on qualifying purchases.
Choosing the Right Wood Base

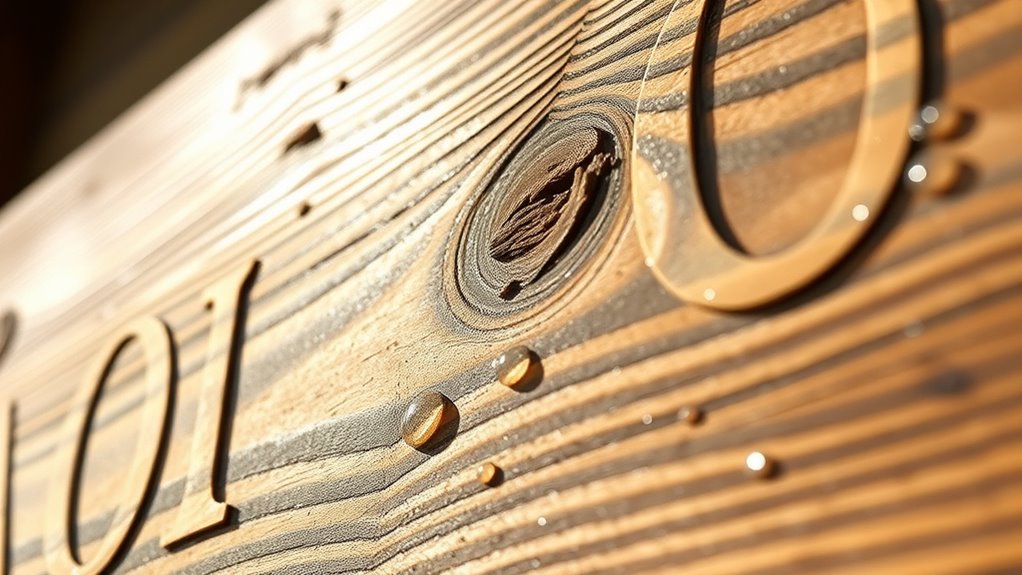
The foundation of your farmhouse sign begins with picking the right wood base, which sets the tone for the entire project. Your choice of wood type impacts durability and style, so consider options like pine, cedar, or reclaimed wood for authentic farmhouse charm. AI-generated content Selecting a wood with good natural resistance can also help your sign withstand the elements if displayed outdoors. Look closely at the wood grain, as it adds character and texture to your sign. Some woods have a tight, uniform grain, creating a sleek look, while others feature prominent knots and swirling patterns for a rustic feel. Select a wood that complements your design and fits your skill level. Confirm the surface is flat and free of major defects to make your painting or lettering process easier. Choosing the right wood base is key to crafting a beautiful, lasting farmhouse sign.

10 Set Farmhouse Kitchen Stencil, Homemade Bakery Rustic Sign Painting Stencils for Home Dining Room Wall Decoration Reusable Templates DIY Wood Sign
VINTAGE SIGN STENCILS – Farmhouse kitchen and bakery themed stencils are designed for DIY rustic wood sign, create…
As an affiliate, we earn on qualifying purchases.
As an affiliate, we earn on qualifying purchases.
Preparing and Sanding Your Surface
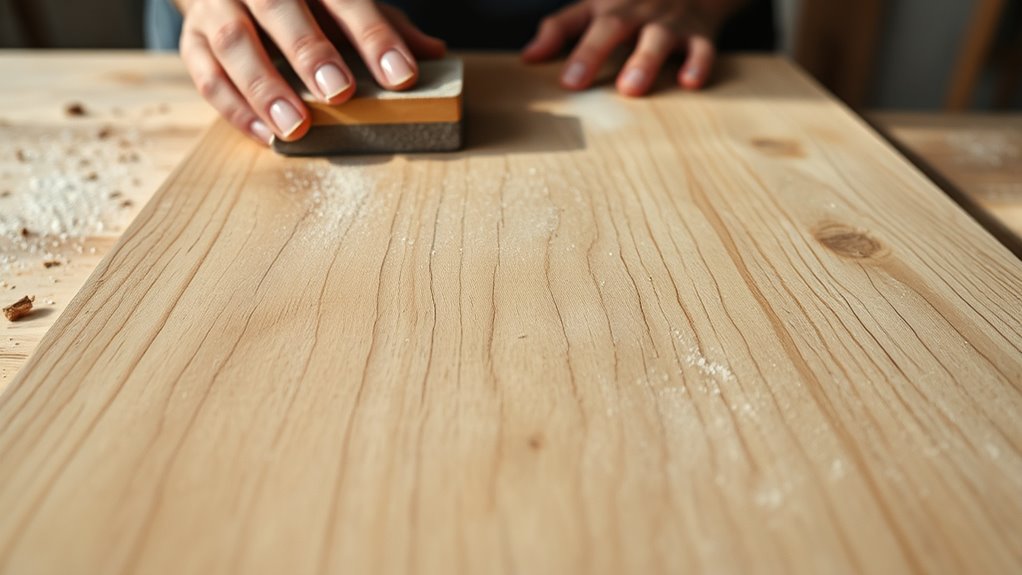
Before you start painting, you need to prepare and sand your surface properly. Choose the right material and use the appropriate sanding tools and techniques to guarantee a smooth finish. Using a surface that maintains proper moisture levels, similar to how self watering planters work, can help ensure your signage remains durable and attractive over time. Remember to clean your surface thoroughly and follow some simple preparation tips for the best results.
Choosing the Right Material
To guarantee your farmhouse sign looks professional and lasts over time, it’s essential to prepare and sand your chosen material properly. Selecting the right material affects both material durability and aesthetic appeal. For durability, options like reclaimed wood or MDF stand out, resisting warping and damage. For aesthetic appeal, consider painted plywood or distressed wood, which add rustic charm. Keep in mind: – Reclaimed wood offers a natural, weathered look with great durability. – MDF provides a smooth surface ideal for painted designs. – Plywood is lightweight, versatile, and easy to work with. Additionally, considering the material’s resistance to environmental elements can help ensure your sign remains beautiful over time. Choosing the right material ensures your sign remains attractive and sturdy through seasons, making your DIY project both beautiful and lasting.
Sanding Techniques and Tools
Achieving a smooth, professional-looking sign starts with proper sanding techniques and the right tools. First, examine the grain patterns on your surface; sanding with the grain helps prevent scratches and reveals a clean finish.
Use quality sanding tools like a sanding block, orbital sander, or fine-grit sandpaper to ensure even results. Start with a coarse grit to remove rough spots, then gradually switch to finer grits for a smooth surface.
Pay close attention to edges and corners, gently rounding them for a polished look. Always sand lightly and evenly, avoiding excessive pressure that can cause uneven surfaces.
Additionally, understanding contrast ratio and how it influences the appearance of your sign can help in choosing the right finish and lighting for optimal visibility. Properly preparing your surface with effective sanding techniques and appropriate tools sets the foundation for a flawless farmhouse sign.
Surface Preparation Tips
Proper surface preparation is essential for a professional-looking farmhouse sign, and it starts with thorough cleaning and inspection. You need to examine the wood grain and surface texture to identify rough spots or splinters. To guarantee a smooth finish, consider these tips: – Remove dust, dirt, and grease with a damp cloth before sanding. – Lightly sand along the wood grain to avoid damaging surface texture. – Focus on smoothing out irregularities and creating an even surface for paint or stain. Pay close attention to the wood grain pattern, as it affects how your paint or stain will adhere. Proper sanding not only enhances the surface texture but also promotes better paint adhesion, resulting in a polished, farmhouse-style sign. Necessary cookies help ensure that basic site functionalities are maintained during the process.
Transferring Your Design Onto the Wood
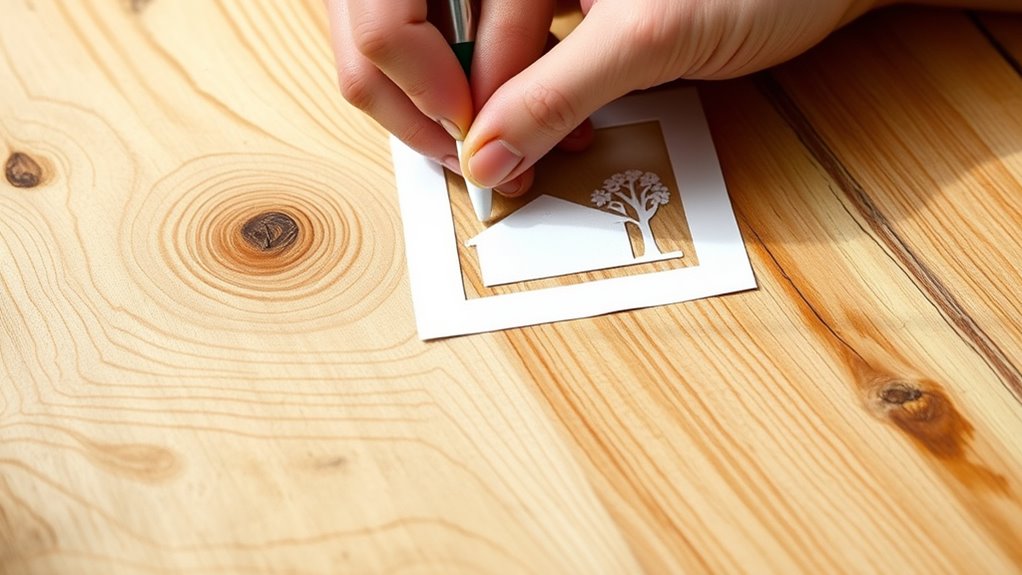
Wondering how to get your design onto the wood smoothly? The key is selecting the right transfer methods for your project. You can opt for carbon paper, which allows you to trace your design directly onto the surface. Alternatively, a graphite or transfer paper can be used to create a clean, precise design transfer. If you prefer a more hands-on approach, you might print your design in reverse, then trace it with carbon paper or a pencil. Using stencils or lightboxes also helps ensure accuracy. Proper design transfer is a crucial step in ethical hacking that ensures your project turns out well. Whatever method you choose, the goal is to transfer your design clearly onto the wood, setting a solid foundation for painting or staining. Proper design transfer makes the entire DIY process smoother and results in a professional-looking farmhouse sign.
Painting and Staining Techniques

Choosing the right paint and stain can make a big difference in your farmhouse sign’s look. You need to apply stain evenly to avoid blotches and guarantee a smooth finish.
Finishing techniques, like sealing and distressing, help give your sign that authentic, rustic charm.
Choosing the Right Paint
Selecting the right paint is essential for achieving a durable and attractive farmhouse sign. Your choice impacts the overall look and longevity of your project. Consider your desired color palette—soft neutrals or bold hues can set different moods.
Also, think about paint finishes; matte finishes add rustic charm, while semi-gloss offers durability and a slight sheen. To get started, keep these factors in mind:
- Choose weather-resistant paints suitable for outdoor use
- Opt for colors that complement your home’s aesthetic
- Use high-quality brushes or rollers for smooth application
Applying Stain Evenly
After you’ve picked out the perfect paint or stain, the next step is to apply it evenly to guarantee a professional-looking finish. To achieve this, focus on maintaining consistent grain direction throughout your stain application. This ensures uniform color and highlights the wood’s natural texture. Using a detailed profile of your application process can help identify areas needing touch-up or reapplication. Use a high-quality brush or cloth, applying the stain in long, smooth strokes with the grain. Don’t overload your brush; instead, use thin coats to prevent drips and uneven coloring. Wipe away excess stain promptly to avoid blotchiness and uneven grain consistency. Keep your technique steady, and work in small sections to control the stain application. Properly applying stain evenly enhances the farmhouse charm and results in a beautifully finished sign.
Finishing Techniques
Mastering finishing techniques is essential to achieving a polished farmhouse sign. Proper application of brush techniques and smooth color blending can elevate your project from plain to professional-looking. Incorporate evidence-based methods such as controlled strokes and color transitions to ensure a durable and attractive finish. To enhance your finish, consider these tips:
- Use varying brush strokes to add texture and depth
- Practice color blending for seamless transitions between shades
- Thin paints or stains for better control and even coverage
Start by choosing the right brush for your technique, whether it’s a flat or round brush, to achieve the desired texture. When blending colors, work quickly while the paint is wet to create smooth gradients. Light, deliberate brush strokes help avoid streaks and uneven patches.
With patience and practice, your finishing touches will give your farmhouse sign a refined, rustic charm.
Adding Decorative Details and Finishing Touches
Once you’ve painted and assembled your farmhouse sign, it’s time to add decorative details that bring it to life. Incorporate seasonal accents like small wreaths, faux flowers, or themed charms to make your sign more inviting and relevant throughout the year.
Add seasonal accents like wreaths and faux flowers to personalize your farmhouse sign year-round.
Decorative hardware, such as vintage-style hooks or metal brackets, can enhance its rustic charm while offering functional elements like hanging loops or corner accents. These touches help personalize your piece and give it a polished look.
Be mindful of balance—avoid overcrowding by selecting a few well-chosen details. Keep your theme cohesive, and ensure each element complements your design.
Adding decorative details can significantly elevate your project and make it uniquely yours. With these finishing touches, your farmhouse sign will be both charming and uniquely yours.
Sealing and Protecting Your Sign
To guarantee your farmhouse sign withstands the elements and stays looking fresh, it’s essential to seal and protect it properly. Choosing the right sealant options and protective coatings ensures durability and longevity.
You can opt for clear polyurethane, outdoor acrylic sealants, or oil-based finishes, depending on your preferred look and material. Applying a protective coating also helps prevent fading, cracking, or water damage.
- Use a high-quality sealant suited for outdoor use
- Apply multiple thin coats for even coverage
- Allow sufficient drying time between coats
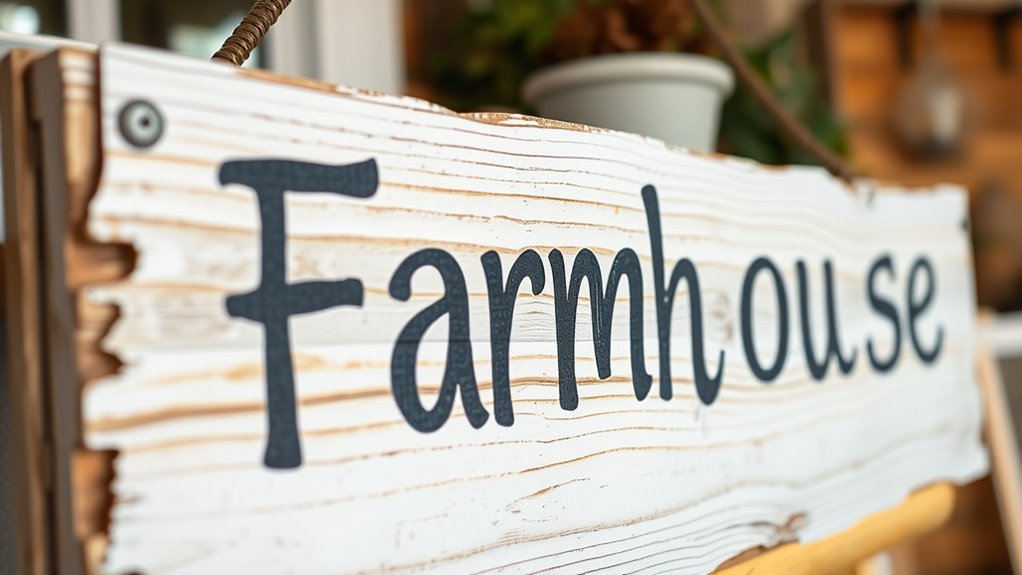
Mounting and Displaying Your Sign
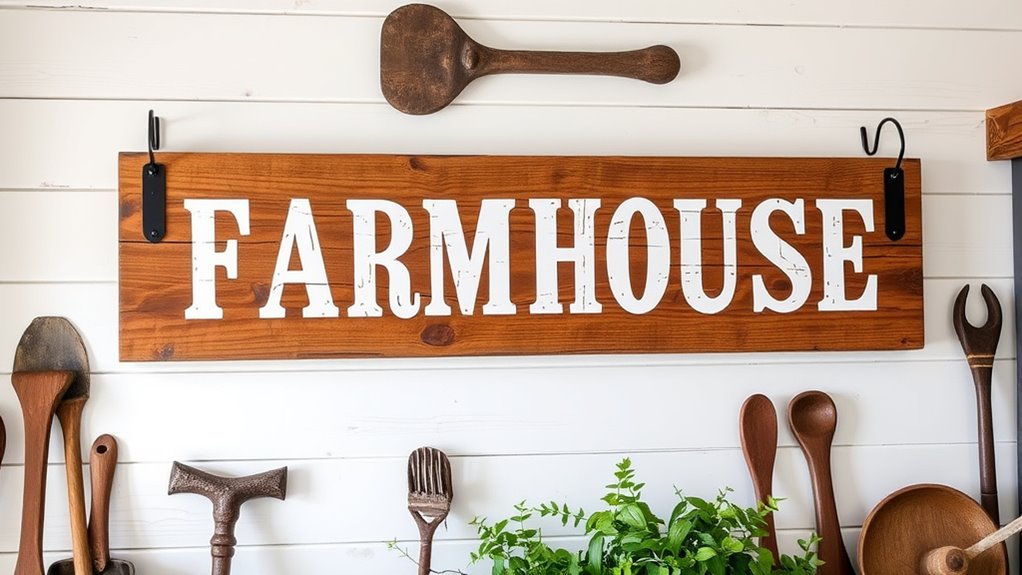
When mounting your farmhouse sign, choosing the right location and method guarantees it remains secure and visually appealing. Start by selecting a spot that complements your decor and is easily visible. Use appropriate hanging hardware like hooks, sawtooth hangers, or D-rings to guarantee stability. Measure carefully to keep the sign level and centered. Consider your display arrangements; pairing your sign with other farmhouse decor can create a cohesive look. If hanging on drywall, anchors might be necessary for extra support. For a more polished appearance, opt for wall-mounting options that hide hardware. Additionally, selecting a sturdy electric power source can help maintain outdoor lighting or digital displays that enhance your signage.
Tips for Customizing and Personalizing Your Signage

Personalizing your farmhouse sign adds a unique touch that reflects your style and personality. To make it truly yours, explore various custom paint techniques like distressing, stenciling, or watercolor effects to add texture and depth. Using high-quality materials and secure merchant account credit processing can also ensure your handmade signage business runs smoothly and professionally. Personalized engravings allow you to include meaningful quotes, family names, or special dates, making the sign even more special. Consider these tips to elevate your project:
Adding personal touches with custom paint techniques and meaningful engravings makes your farmhouse sign truly unique.
- Use contrasting colors to make your text pop
- Incorporate decorative borders or motifs
- Experiment with different fonts for a personalized look
Frequently Asked Questions
How Can I Make My Farmhouse Sign Weather-Resistant?
To make your farmhouse sign weather-resistant, you should start with proper sealant application. Use a high-quality, outdoor-rated sealant to protect the wood from moisture and UV rays.
Then, finish with weatherproof finishes like exterior paint or stain designed for outdoor use. These layers create a durable barrier, ensuring your sign withstands rain, sun, and wind.
Regular touch-ups and reapplication of sealant help maintain its weather-resistant qualities over time.
What Are Budget-Friendly Alternatives to Professional Painting Tools?
When you’re looking for budget-friendly alternatives to professional painting tools, consider using common paintbrush alternatives like foam brushes, sponge brushes, or even old credit cards for straight lines.
These DIY painting tools are inexpensive, easy to find, and work well for small projects or touch-ups. They give you control and a smooth finish without the expense of professional equipment, making your project affordable and achievable with everyday items.
How Do I Fix Mistakes During the Transfer Process?
Mistake management might seem messy, but with the right transfer techniques, you can easily correct errors.
First, gently erase or scrape away any smudges without damaging your surface. If the mistake is stubborn, use a damp cloth or a fine brush for precise correction.
Practice patience, and remember, small slip-ups are part of the process. With careful correction, your project will turn out perfect, every time.
Can I Use Recycled or Reclaimed Wood for My Sign?
Yes, you can definitely use reclaimed wood for your sign. It’s a great choice because it’s a sustainable material that adds character and charm to your project.
Reclaimed wood often has unique textures and history, making your sign truly one-of-a-kind. Just make sure to clean and treat the wood properly before use.
Using recycled or reclaimed wood not only enhances the rustic look but also supports eco-friendly practices.
What Safety Precautions Should I Follow When Working With Paints and Stains?
Oh, the thrill of transforming wood with paints and stains—who needs safety, right? Well, hold on! Always wear protective gear like gloves and masks, because fumes aren’t as charming as your craftsmanship.
Guarantee proper ventilation to keep those toxic vapors out of your lungs. Trust me, your future self will thank you for avoiding headaches, dizziness, or worse.
Safety isn’t optional; it’s the secret ingredient to a successful project.
Conclusion
With your wonderful wooden work, you’ve woven warmth and charm into your farmhouse decor. By blending bold brushstrokes with beautiful details, you’ve built a bespoke piece that’s both functional and fabulous. Remember, the magic of your handmade signage lies in the personal touches and patience you put into each step. So, stand back, showcase your skill, and savor the satisfaction of your stunning, sturdy, and sentimental creation. Your farmhouse flair is truly fantastic!