Creating an authentic farmhouse look with distressed wood requires more than just roughing up the surface. You need to select the right materials, apply techniques that enhance the wood’s natural charm, and finish with care to guarantee durability. It’s a process that balances artistry and patience—one that can transform plain wood into a piece full of character. Ready to explore the steps that make this possible? Let’s get started.
Key Takeaways
- Select soft, prominent-grain woods like pine or oak for easier distressing and authentic texture.
- Sand surfaces smoothly, then focus on edges and corners to create natural-looking wear.
- Use tools like wire brushes or chisels to add irregular marks and chipped effects.
- Apply paint, stain, or glaze in layers, then gently wipe or sand to reveal underlying wood.
- Finish with a matte sealant or wax to protect the distressed look and enhance vintage character.

BeeCastle 10-Frames Complete Beehive Kit, 100% Beeswax Coated Bee Hive Includes Beehive Frames and Beeswax Coated Foundation Sheet (2 Layer)
[Thicker and Full Beeswax Coating] - BeeCastle hives are fully soaked in the boiled beeswax(the beeswax deeply soaks...
As an affiliate, we earn on qualifying purchases.
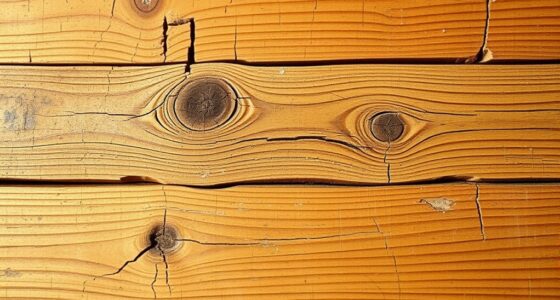
Selecting the Right Wood and Preparing Your Surface
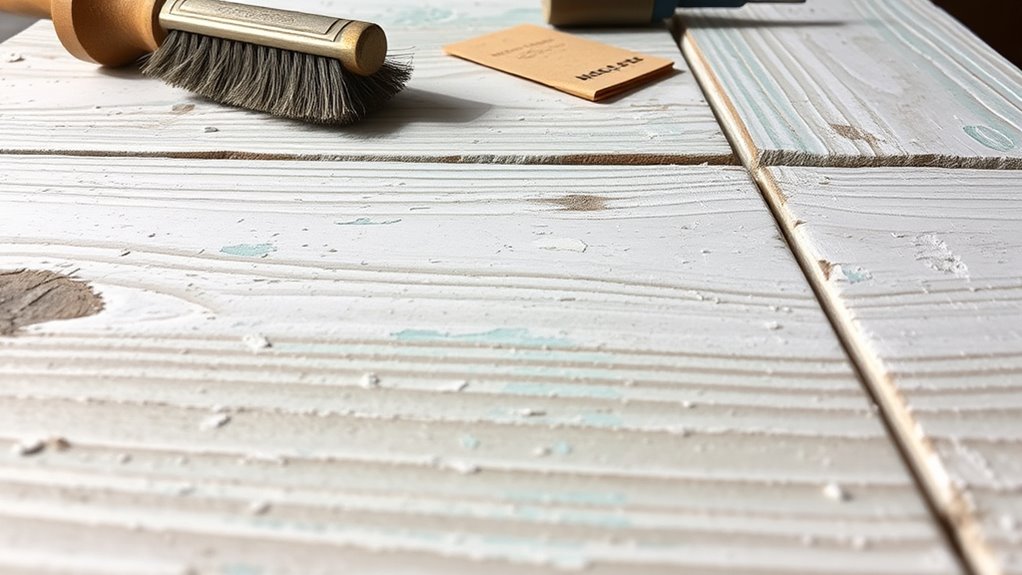
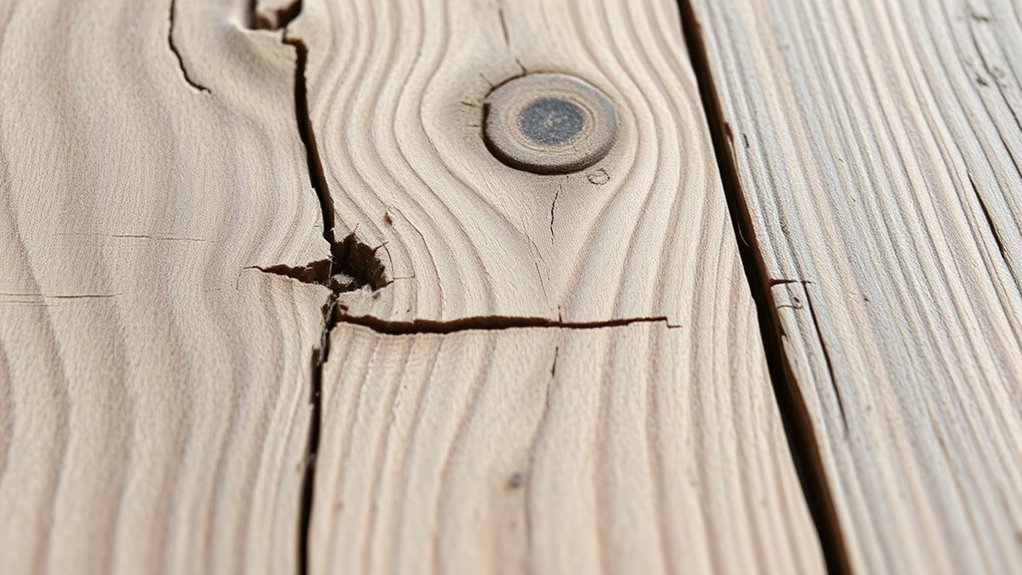
Choosing the right wood is essential for achieving an authentic farmhouse distressed look. You want to start by examining grain patterns, which add character and authenticity to your piece. Look for wood types with prominent grain patterns like pine, oak, or reclaimed barn wood, as these natural features enhance the aged, rustic appearance. Additionally, understanding the best wood choices for distressing can help you select materials that respond well to distressing techniques and maintain their charm over time. Consider the hardness and durability of the wood, since softer woods are easier to distress but may wear faster. Prepare your surface by sanding smoothly to remove any rough patches, then clean thoroughly to eliminate dust and debris. Selecting the right wood and preparing the surface properly set the foundation for a convincing distressed finish. This careful choice ensures your project captures the genuine farmhouse charm you’re aiming for.

10-Frame Langstroth Beehive Dipped in 100% Beeswax, Complete Bee Hives and Supplies Starter Kit Includes 2 Deep Hive Bee Boxes and 1 Bee Hive Super with Beehive Frames and Foundations
STANDARD SIZE - 2 Heavy beeswax coated deep brood boxes (16-1/4″ x 19-7/8″ x 9-5/8″) with 20 premium...
As an affiliate, we earn on qualifying purchases.
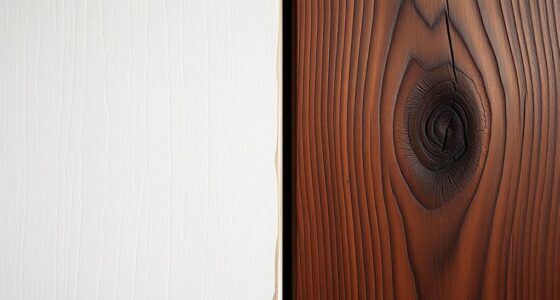
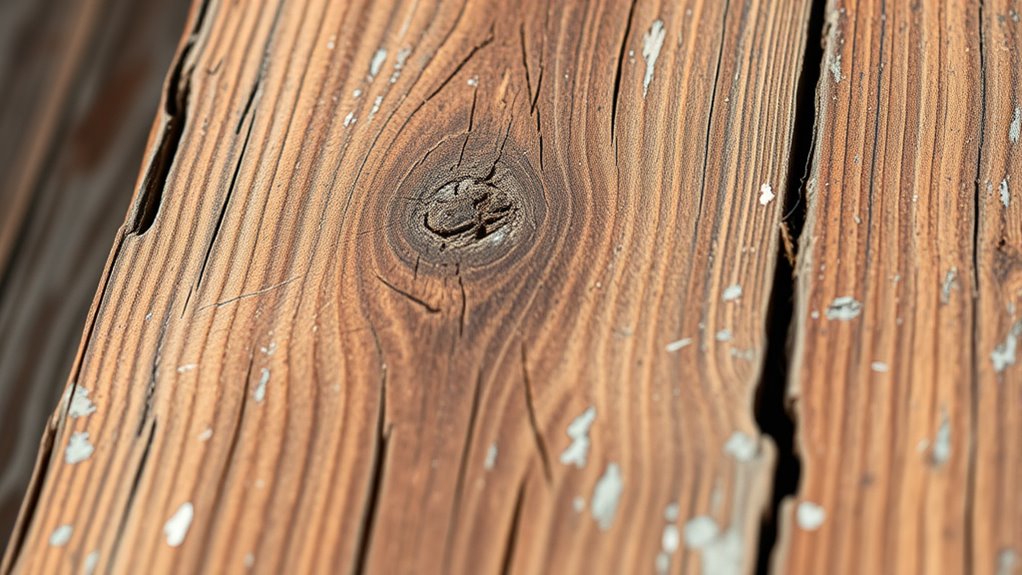
Techniques for Creating a Weathered Finish

To achieve an authentic weathered finish, you need to employ specific techniques that mimic natural aging. One effective method is creating a rust effect, which involves applying subtle metallic paints or powders to simulate corrosion, giving your wood a aged, industrial look.
Additionally, sandpaper techniques play a vital role; gently sanding edges and high-traffic areas reveals underlying layers and creates a worn, chipped appearance. Use different grits of sandpaper to carefully distress the surface without overdoing it.
For an even more convincing weathered look, consider distressing tools such as wire brushes or chisels to add irregular marks and textures that resemble natural wear. Combining these methods helps produce a convincing weathered finish that looks genuine. Focus on areas where natural wear would occur, such as corners and edges, to enhance realism.
With patience and attention to detail, your wood will develop a beautifully aged, farmhouse charm.

Hoover Hives: The Original Beeswax Coated Beehive Kit. Includes 2 Deep & 1 Medium Boxes with 10 Wooden Frames & Heavy Wax Coated Foundations. Easy Assembly with Predrilled Holes& Screws (Unassembled)
Premium Quality Construction: Hoover Hives' Original Beeswax Coated Beehive Kit is crafted with precision and durability in mind,...
As an affiliate, we earn on qualifying purchases.
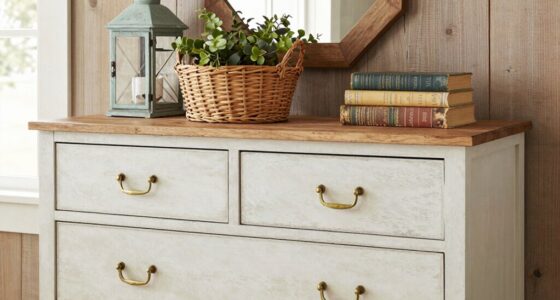
Adding Depth and Character With Paint and Stains
Adding depth and character to your distressed wood involves skillfully applying paint and stains to highlight the wood’s natural features. Start by color matching your paint or stain to complement the existing tones, ensuring a cohesive farmhouse look. Use a darker stain or glaze to enhance the grain, making the wood’s texture more prominent. Gentle wiping or brushing techniques can emphasize the grain without overdoing it. Layering different shades allows you to create rich depth, giving your piece a more authentic, aged appearance. Remember, subtle variations in color and grain enhancement add visual interest and authenticity. Carefully blending your colors and focusing on the natural patterns of the wood will help you achieve a beautiful, distressed finish that truly captures that rustic charm. To ensure your project is successful, research protecting your investments and use secure materials to preserve your craftsmanship over time.

Victoria Manual Cast Iron Grain Mill with High Hopper, Premium Corn-Grinding Mill and Grain Grinder, Made in Colombia
PREMIUM CAST IRON GRINDER: Known as a “molino para moler maiz,” our cast iron mill makes grinding easy...
As an affiliate, we earn on qualifying purchases.
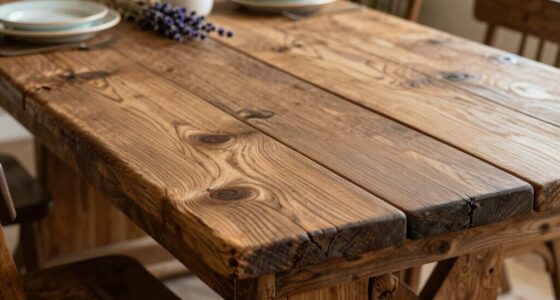
Applying Finishes for a Durable, Vintage Look
Applying finishes is essential to protect your distressed wood and achieve that authentic vintage appearance. A good sealant, like wax or polyurethane, guarantees your furniture resists scratches and moisture while enhancing its antique charm. To maintain the proper moisture levels and prevent overexposure, consider incorporating self watering planters in your decor to keep your wood pieces in optimal condition. When adding decorative hardware or lighting fixtures, choose finishes that complement the aged look—distressed metal or weathered coatings work beautifully. These accents not only boost durability but also reinforce the farmhouse aesthetic. Be sure to apply your chosen finish evenly, paying attention to corners and edges where wear naturally occurs. Allow sufficient drying time before attaching hardware or fixtures. The right finishing touch makes your piece more resilient and visually cohesive, ensuring your vintage-inspired furniture remains stunning and functional for years to come.
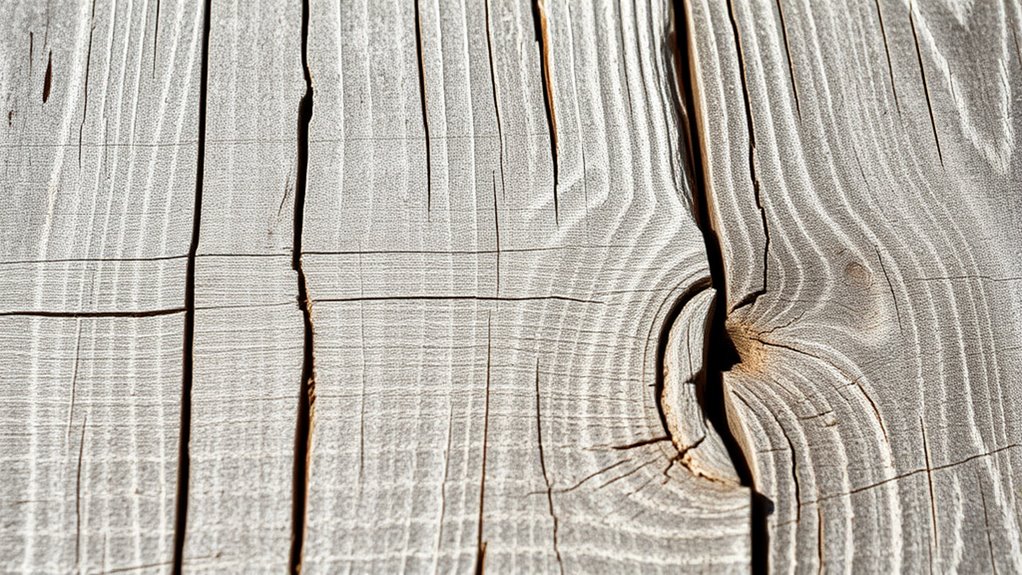
Tips for Achieving a Consistent and Natural Distress Effect

Achieving a consistent and natural distress effect requires careful planning and attention to detail. To enhance your project, focus on how the wood grain interacts with the finish sheen. Incorporating cultural narratives into your distressing process can add depth and authenticity to the aged appearance. Here are some tips:
- Vary distressing techniques slightly across different areas to mimic natural wear, emphasizing the wood grain’s texture.
- Use a matte or low-sheen finish to make the distressing look authentic and subtle, avoiding a shiny, artificial appearance.
- Test your distressing methods on scrap wood first, paying close attention to how the wood grain responds and how the finish sheen affects the overall look.
Frequently Asked Questions
Can I Distress Wood Without Using Chemicals or Power Tools?
You can definitely distress wood without chemicals or power tools by using natural aging techniques. Try rubbing the wood with sandpaper or a rough cloth to create worn spots.
You can also use vinegar or lemon juice for an eco-friendly finish that accelerates aging.
Dents and scratches can be made with simple tools like a hammer or nails.
These methods give your wood a charming, authentic farmhouse look while keeping it natural and safe.
How Do I Prevent Over-Distressing and Maintain Balance?
To prevent over-distressing and maintain visual balance, you should start with a light touch and gradually apply distressing techniques. Regularly step back and assess your work to see if the distressed areas complement each other.
Use targeted techniques like sanding or scraping sparingly, focusing on areas that naturally wear. This approach helps you achieve a balanced, authentic look without overdoing it, ensuring your project remains visually appealing.
What Types of Wood Are Best for Authentic Distressing?
Imagine you’re choosing a vintage photo, where every grain variation tells a story. When selecting wood for authentic distressing, opt for softwoods like pine or cedar, which reveal natural wear easily.
Their varied wood grain and softer texture make distressing more authentic and manageable. Hardwoods like oak or maple can work too, but their tighter grain might require more effort, making softer woods your best story for a genuine farmhouse look.
How Long Does the Distressing Process Typically Take?
When planning your distressing project, timing considerations are key to achieving the authentic look. Typically, the process takes anywhere from a few hours to a day, depending on the extent of distressing and your technique.
You should allocate enough time for surfaces to dry between steps and allow for detail work. Proper project planning helps you stay patient and guarantees a natural, aged appearance without rushing through the process.
Can Distressing Be Reversed or Repaired if I Make a Mistake?
You might find it surprising, but distressing isn’t always permanent. If you mess up, restoration options include sanding or applying a fresh finish, making DIY repair achievable.
Sometimes, the imperfections add charm, but if you want a flawless look, you can reverse mistakes with patience. Remember, a little distressing can be corrected, so don’t worry—your farmhouse masterpiece can still shine through with some careful touch-ups.
Conclusion
Now you’re all set to transform your wood into a stunning farmhouse masterpiece! With these techniques, your piece will look like it’s been around since the dawn of time—full of character, charm, and a touch of weathered magic. Just remember, the more you distress, the more it screams “vintage treasure.” So don’t hold back—go wild, get creative, and watch your wood turn into a show-stopping, time-worn beauty that’ll make everyone say, “Wow, that’s rustic perfection!”