
Installing DIY soapstone countertops can be a cost-effective project that saves you money on professional labor. You’ll need basic tools like a circular saw, clamps, a level, and safety gear. The process involves measuring, cutting, and securing the slabs, then sealing with mineral oil. With proper preparation and patience, you’ll create a durable, beautiful surface. If you’re curious about detailed steps and tips, there’s plenty more to discover below.
Key Takeaways
- DIY soapstone countertops save money by eliminating professional installation costs and allow for personalized craftsmanship.
- Essential tools include a circular saw, clamps, level, and safety gear for precise cutting and secure fitting.
- Measure accurately, prepare the workspace, and ensure cabinets are level before installation for best results.
- Seal the surface with mineral oil, applying multiple coats and reapplying periodically to protect and enhance appearance.
- Proper maintenance and sealing develop a charming patina, ensuring long-lasting durability and a timeless look.
If you’re considering a cost-effective way to upgrade your kitchen, DIY soapstone countertops offer a durable and stylish option. Soapstone has a timeless look that pairs well with many design styles, and tackling the project yourself can save you money while giving you a sense of accomplishment. Before diving in, it’s important to understand the proper sealing techniques to protect your surface and keep it looking beautiful over time. Unlike some materials, soapstone is naturally resistant to staining, but it still benefits from a good sealant—especially during installation and periodically afterward. Applying mineral oil is a common sealing technique that enhances the stone’s natural color and provides a protective layer. You’ll want to apply multiple coats, allowing each to soak in before adding the next, to ensure an even, long-lasting seal. This not only preserves the stone but also makes maintenance easier, as dirt and liquids won’t penetrate the surface as easily.
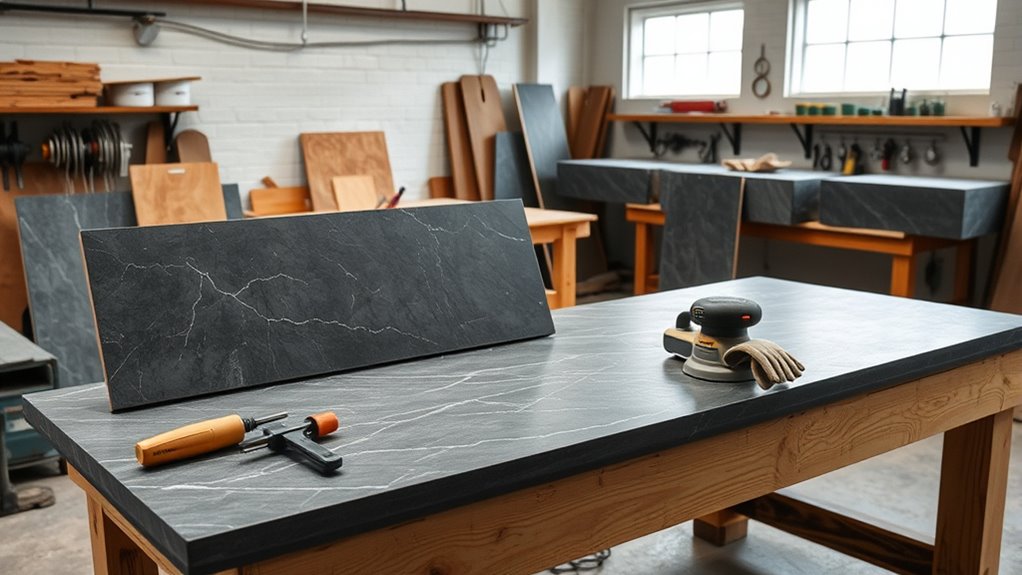
When it comes to maintenance tips, soapstone is surprisingly low-maintenance, but regular upkeep helps prolong its lifespan. After sealing, you should wipe spills promptly to prevent stains, especially from acidic substances like vinegar or citrus. Occasionally, reapplying mineral oil or a specialized soapstone conditioner can restore the countertop’s luster and deepen its color, keeping it looking fresh. For cleaning, a simple mixture of warm water and mild dish soap usually suffices; avoid harsh chemicals or abrasive scrubbers that could damage the surface. If scratches or nicks do occur, light sanding with fine-grit sandpaper can smooth out imperfections, and reapplication of mineral oil will help blend repairs seamlessly. Additionally, choosing the right sealing and maintenance techniques can help enhance the color accuracy and overall appearance of your soapstone.
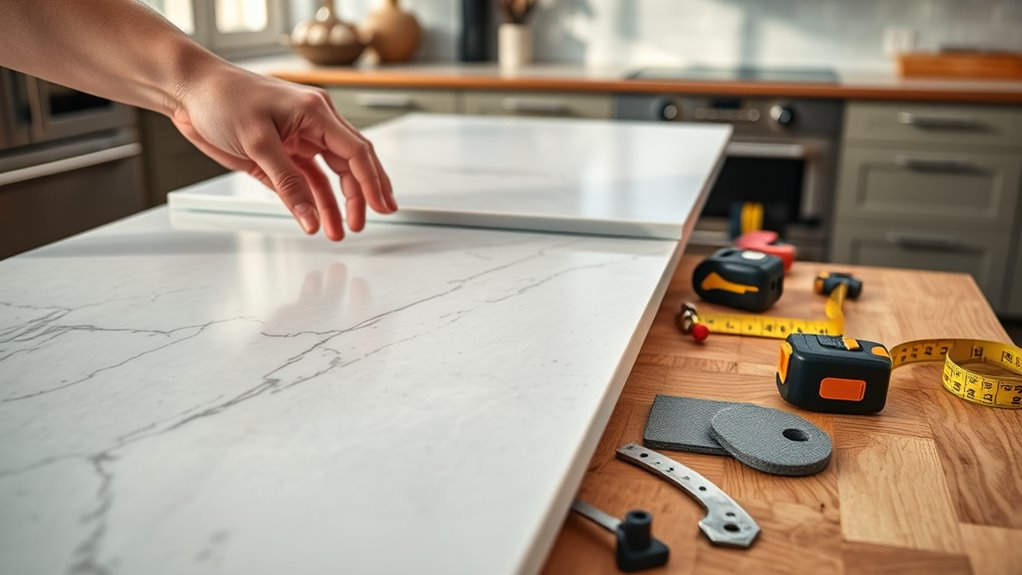
In terms of installation, you’ll need basic tools like a circular saw, clamps, a level, and safety gear. Cutting and fitting your soapstone requires precision, so measure twice and cut once. When installing, ensure your cabinets are level and sturdy, since soapstone is dense but still needs support. Once in place, secure the countertops with appropriate fasteners and seal the edges to prevent water infiltration. Throughout the process, keeping your workspace clean and organized will help you avoid mistakes. Remember, the key to a successful DIY soapstone project isn’t just in the initial installation but also in ongoing maintenance and sealing. With proper sealing techniques and consistent care, your countertops will age gracefully, developing a charming patina that adds character over time. This combination of cost savings, craftsmanship, and low-maintenance upkeep makes DIY soapstone countertops a rewarding choice for any homeowner willing to put in the effort.

BAIQI Tungsten Steel 8 Pcs Hand Carve Tool Kit for Enthusiast to Engrave Soft Limestone and SlateStone Alabaster Wood Soap Stone Seal Sculpture DIY Craft (10 PCS Carve Tool Set)
High Quanilty:Made of high quality steel for durable and longtime use to bring you the best worktime experience.
As an affiliate, we earn on qualifying purchases.
As an affiliate, we earn on qualifying purchases.
Frequently Asked Questions
How Long Does Soapstone Countertop Installation Typically Take?
The installation timeline for soapstone countertops usually takes about one to three days, depending on the project’s complexity. You’ll want to account for the preparation process, which involves measuring, cutting, and sealing the stone. Your preparation guarantees a smooth installation. If you’re doing it yourself, expect some extra time for handling and fitting the slabs accurately. Overall, plan for a couple of days to complete the entire installation confidently.
Can Soapstone Countertops Be Repaired if Scratched or Stained?
Like a seasoned painter touching up a masterpiece, you can repair soapstone countertops if scratched or stained. For scratch repair, gently sand the affected area with fine grit, then apply mineral oil to blend it in. For stain removal, use a poultice or a mixture of baking soda and water, letting it sit before wiping away. These simple fixes keep your surface looking pristine and timeless.
What Are the Best Sealants for Soapstone Surfaces?
When choosing sealants for soapstone surfaces, you want to contemplate sealant types like mineral oil, paraffin wax, or penetrating sealers. You should apply these sealants using proper application techniques, such as cleaning the surface thoroughly, applying evenly with a cloth or brush, and allowing adequate drying time. Regular resealing helps maintain the stone’s appearance and protection. Always follow manufacturer instructions for the best results.
Is Professional Help Necessary for Cutting Soapstone?
Imagine slicing through a delicate yet sturdy material—cutting soapstone requires more than just a sharp blade. While DIY safety and proper tool selection are essential, professional help isn’t always necessary if you have experience and the right tools. However, soapstone can be tricky to cut cleanly, so if you’re unsure or lack confidence, hiring a pro guarantees precision and safety. It’s your choice—know your skills before tackling this task alone.
How Do Soapstone Countertops Compare to Granite in Durability?
When comparing soapstone countertops to granite, you find that soapstone is softer and more prone to scratches and dents, but it’s highly resistant to heat and stains. Unlike granite, which is more durable and resistant to chips, soapstone requires regular sealing. In a quartz vs marble comparison, quartz offers durability, while marble is more delicate. Choose soapstone if you prefer a softer, heat-resistant surface, but know it needs more maintenance.
Rhino Wax Soapstone Oil 8oz – Condition, Seal, and Protect Soap-Stone, Slate and Concrete Countertops and Kitchen Surfaces – Natural Blend (NO Mineral Oil) – Food Safe – Easy to Apply – Made in USA
Effective Hydration: Formulated to condition and hydrate soapstone, slate, or concrete surfaces
As an affiliate, we earn on qualifying purchases.
As an affiliate, we earn on qualifying purchases.
Conclusion
Now that you’ve learned how to craft your own soapstone countertops, you’re ready to channel your inner artisan and create something timeless—like the artisans of old who shaped stone with skill and patience. With the right tools and steps, you can transform your space into a masterpiece that whispers stories of craftsmanship. Remember, as with any great creation, patience and care will turn your DIY project into a lasting treasure.

VEVOR Electric Concrete Cutter, 9 in Circular Saw with 3.5 in Cutting Depth, Wet/Dry Disk Cutter Includes Water Line, Pump and Blade, for Stone, Brick, Porcelain, Concrete, 1800W Motor
Wet Cutting without Dirt: VEVOR electric concrete saw provides a better cutting vision by avoiding the debris that…
As an affiliate, we earn on qualifying purchases.
As an affiliate, we earn on qualifying purchases.

VEVOR Seamless Seam Setter 2 Packs with 6 in Vacuum Suction Cups for Seam Joining & Leveling, 530LB Professional Countertop Installation Tool for or Granite, Stone, Marble,Tile Gap Regulator Orange
Powerful Suction: This seamless seam setter features a 6-inch nitrile rubber suction cup that generates up to 530…
As an affiliate, we earn on qualifying purchases.
As an affiliate, we earn on qualifying purchases.