Eager to take your DIY projects to the next level? Search no more! Presenting the ultimate manual for achieving expert distressed finishes.
With our 12 key tips, you’ll transform ordinary furniture into stunning pieces that tell a story. From choosing the perfect paint colors to troubleshooting common challenges, we’ve got you covered.
Get ready to unleash your creativity and create authentic, aged effects that will leave everyone in awe.
Let’s dive in and unlock the secrets of distressed finishes together!
Key Takeaways
- Choose paint colors that enhance the overall look and feel of distressed finishes, such as earthy tones and contrasting colors.
- Prepare the surface properly by cleaning and sanding it to create a rough texture.
- Use high-quality brushes and tools to achieve the best distressed finishes, and experiment with different techniques and textures.
- Add depth and character to the project by layering different paint colors and textures, and use finishing techniques like staining, waxing, and glazing to enhance the distressed look.
Top picks for "tips master distress"
Open Amazon search results for this keyword.
As an affiliate, we earn on qualifying purchases.
Choosing the Right Paint Colors
We’re currently discussing which paint colors will work best for our project. When it comes to mastering distressed finishes, choosing the right paint colors is crucial.
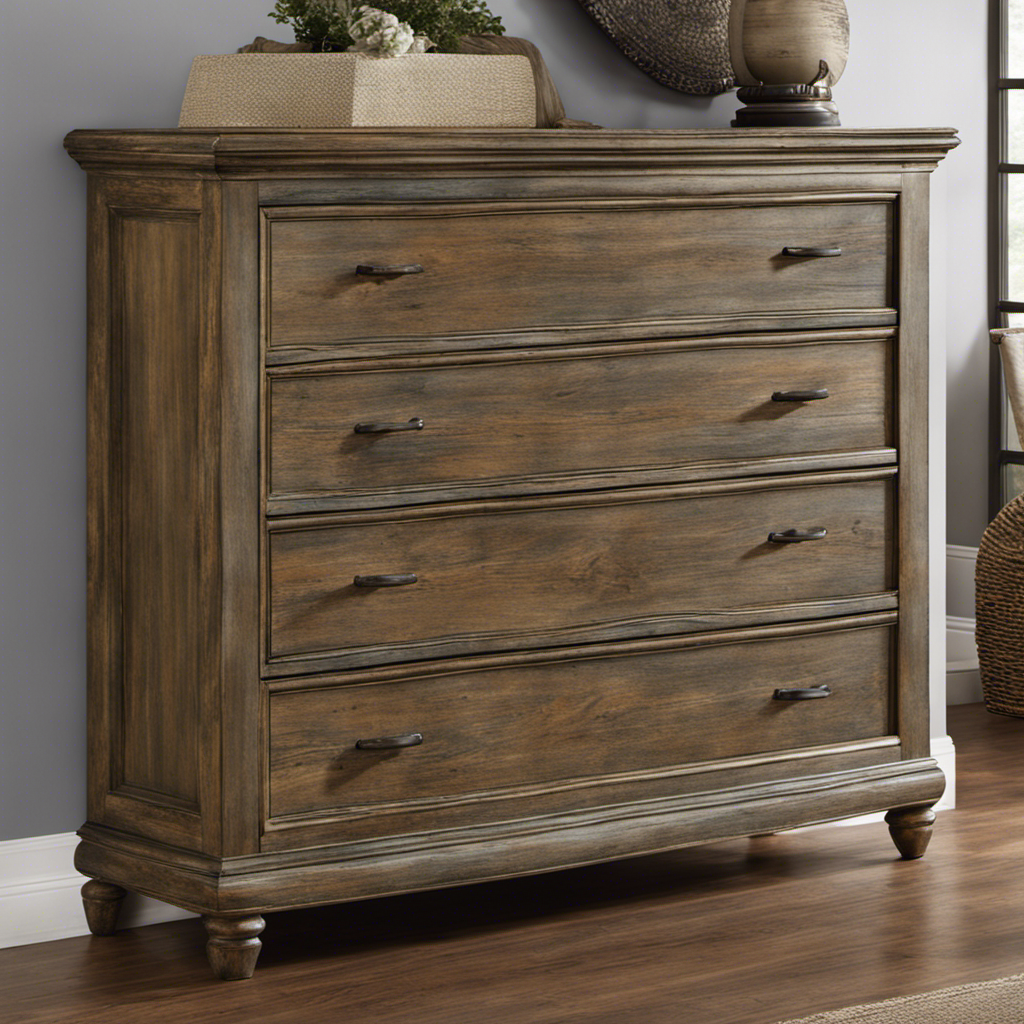
We want to create a look that’s both aesthetically pleasing and authentic. Our painting techniques will heavily rely on the color palettes we select. We’re considering earthy tones like muted greens and warm browns to achieve a rustic and weathered appearance. These colors will bring depth and character to our project.
Additionally, we’re exploring the possibility of using contrasting colors to create a more dramatic effect. By carefully considering our color choices, we can enhance the overall look and feel of our distressed finishes, making them stand out and captivating to the eye.
Preparing Your Surface for Distressing
Before distressing, we need to thoroughly clean and sand the surface to ensure a smooth and even finish. Surface preparation is crucial for achieving the desired distressed look.
To begin, remove any dirt, debris, or old paint from the surface using a mild soap and water solution. Once clean, lightly sand the surface using a fine-grit sandpaper to create a rougher texture for the paint to adhere to. This will also help to smooth out any imperfections on the surface.
After sanding, wipe away any dust with a damp cloth and allow the surface to dry completely before moving on to the distressing techniques. Remember, proper surface preparation is the foundation for a successful distressed finish.
Selecting the Right Tools and Brushes
We’ve found that using high-quality brushes and a variety of tools is essential for achieving the best distressed finishes. When it comes to brush care, it’s important to clean them thoroughly after each use to maintain their quality and prolong their lifespan. Use warm water and a mild soap to gently remove any paint or debris from the bristles, then reshape them and let them air dry.
As for achieving texture, different brushes and tools can help create unique effects. A stiff bristle brush, for example, can be used to create deep grooves and rough textures, while a sponge or rag can give a softer, more worn appearance. Experimenting with different tools and techniques will allow you to create truly authentic and visually appealing distressed finishes.
Understanding Different Distressing Techniques
As we delve into understanding different distressing techniques, it’s crucial to explore the various ways to achieve desired effects such as chipping, sanding, and antiquing.
Distressing tools play a vital role in creating texture and adding character to our projects. One of the most popular tools is a sanding block, which helps us achieve a worn-out look by smoothing the surface and revealing underlying layers of paint or wood.
Another essential tool is a chisel, which allows us to create intentional chips and dents, giving the piece a weathered appearance.
Additionally, we can use a wire brush to remove paint or stain, adding depth and texture to the surface.
Creating Authentic Looking Wear and Tear
When it comes to creating authentic looking wear and tear, we need to focus on choosing realistic distressing techniques, selecting appropriate materials, and achieving natural aging effects.
By carefully studying the different distressing techniques available, we can choose the ones that will best replicate the desired wear and tear.
Additionally, selecting the right materials, such as aged wood or antique fabrics, can greatly enhance the authenticity of the distressed finish.
Choosing Realistic Distressing Techniques
Our favorite technique for achieving realistic distressing involves using sandpaper to gently wear away the paint. By carefully sanding the surface, we can create natural aging effects that give our pieces a unique and authentic look. This technique allows us to mimic the wear and tear that occurs over time, giving our furniture character and charm.
To achieve the best results, it’s important to start with a smooth and clean surface. We recommend using a medium-grit sandpaper and applying light pressure to avoid removing too much paint at once. It’s also helpful to vary the direction and intensity of the sanding to create a more natural and random appearance.
In addition to sandpaper, we find that other tools can be used to enhance the distressed look. For example, using a hammer or chain to create dents and dings, or using a wire brush to create subtle scratches.
Selecting Appropriate Materials
We carefully consider the durability and texture of different materials, so that we can achieve an authentic and natural looking wear and tear. When distressing furniture, choosing the right materials is crucial to achieving the desired effect.
Here are some tips for selecting appropriate materials:
-
Opt for solid wood: Solid wood furniture is ideal for distressing because it can withstand the sanding and painting process, and it ages beautifully over time.
-
Look for natural imperfections: Knots, cracks, and blemishes add character to distressed furniture. Choose materials with these natural imperfections to enhance the overall look.
-
Consider reclaimed or salvaged wood: Using reclaimed or salvaged wood not only adds an eco-friendly touch to your project but also provides a unique and authentic distressed appearance.
By carefully selecting appropriate materials, we set the foundation for achieving natural aging effects that will make our distressed furniture truly stand out.
Now, let’s explore some techniques to bring that aged charm to life.
Achieving Natural Aging Effects
To achieve natural aging effects on our distressed furniture, we experiment with various techniques and materials, such as sanding and painting, to create an authentic and worn appearance. Aging techniques play a crucial role in giving our furniture a vintage charm and character.
We employ natural distressing methods that mimic the effects of time and use, ensuring that each piece tells a unique story. By carefully sanding the edges and corners, we create subtle wear marks that suggest years of use. This attention to detail adds depth and authenticity to the overall finish.
Additionally, layering paint is another essential aspect of our process. By applying multiple coats of paint in different shades and tones, we achieve a multi-dimensional look that enhances the distressed effect. The layering technique adds richness and complexity to the final appearance, making the furniture truly one-of-a-kind.
Layering Paint for a Multi-Dimensional Look
When it comes to achieving a multi-dimensional look with paint, layering is key. By carefully selecting colors that complement each other and building layers of paint, you can create depth and texture in your finishes.
Additionally, using different tools, such as brushes, sponges, or even your fingers, can help you achieve unique effects and add even more dimension to your piece.
Let’s now discuss the specific points of color selection and layering, tools for paint layering, and techniques for distressed finishes.
Color Selection and Layering
Our approach to color selection and layering involves experimenting with different shades and textures to achieve a truly unique and dynamic finish. We believe that the right combination of colors can elevate a distressed finish from ordinary to extraordinary.
Here are some key tips to master the art of color blending and layering:
-
Start with a base color: Choose a solid color as your base and apply it evenly to the surface. This will serve as the foundation for the distressed look.
-
Layer with complementary shades: Select a few shades that complement the base color and apply them in random areas using a dry brush technique. This will add depth and dimension to the finish.
-
Use distressing tools: To create an authentic distressed look, use tools like sandpaper, steel wool, or even a hammer to gently distress the painted surface. This will reveal the layers of color underneath, creating a beautifully aged effect.
Tools for Paint Layering
Using a dry brush technique and layering different shades, we’re able to achieve a multi-dimensional look by utilizing the right tools for paint layering. Paint layering techniques involve building up layers of paint to create depth and texture in our artwork.
To achieve a textured finish, we can use tools such as palette knives, sponges, and even old credit cards. These tools allow us to create interesting textures by applying and manipulating the paint in different ways.
The dry brush technique, in particular, involves using a dry brush with minimal paint to lightly brush over the surface, leaving behind subtle streaks and highlights.
By experimenting with these techniques and tools, we can add depth and dimension to our paintings, creating a visually captivating piece of art.
Now, let’s dive into techniques for distressed finishes.
Techniques for Distressed Finishes
With a combination of sanding and layering, we can create a beautifully worn and aged look that adds character and charm to our distressed finishes. Achieving a vintage look through distressing is a popular technique in the world of interior design. It allows us to transform new furniture or surfaces into pieces that have a rich history and story to tell.
Here are some key tips for mastering distressed finishes:
- Experiment with different sanding techniques to achieve varying levels of distressing.
- Layer different paint colors and textures to create depth and dimension.
- Don’t limit distressing to just wooden surfaces; try it on metal, glass, or even fabric for a unique look.
Adding Depth With Stain and Wax
We can achieve a richer look by applying multiple coats of stain and wax to add depth to our distressed finishes.
When it comes to staining techniques, there are a few key tips to keep in mind. First, make sure to choose the right type of stain for your project, whether it’s oil-based or water-based.
Next, apply the stain evenly and in the direction of the wood grain for a smooth and professional finish. After the stain has dried, it’s time to move on to wax application.
Wax not only adds a protective layer to your furniture but also enhances the color and depth of the stain. Apply the wax in circular motions using a soft cloth, and make sure to buff it to a shine for a stunning final result.
Now, let’s transition into the next section about using sandpaper and steel wool for distressing.
Using Sandpaper and Steel Wool for Distressing
One important tip to keep in mind when distressing furniture is to start with a coarse grit sandpaper, such as 80 or 100, to remove the desired amount of paint or finish. This initial step is crucial in achieving the desired rustic, worn look. Once the paint or finish has been properly sanded, it’s time to move on to the next step.
Here are a few other techniques that can help create a rustic look with distressing:
- Use steel wool to further distress the wood surface, focusing on areas that would naturally wear over time.
- Try using a mixture of vinegar and water to create an aged effect. Simply apply the mixture to the sanded areas and let it sit for a few minutes before wiping away excess liquid.
- Experiment with different distressing techniques, such as scraping, denting, or even adding small holes, to add depth and character to your furniture.
Incorporating Crackle Medium for an Aged Effect
Let’s try incorporating crackle medium for an aged effect and see how it adds depth and texture to our furniture. Crackle medium application is a technique that can give your furniture a beautifully weathered appearance. By applying a layer of crackle medium between two coats of paint, you can achieve a crackle effect that resembles aged paint with cracks and crevices. This technique adds character and charm to any piece of furniture.
To help you understand the process, here’s a table outlining the steps for achieving crackle effect using crackle medium:
| Step | Description |
|---|---|
| 1 | Prepare the surface by cleaning and sanding it. |
| 2 | Apply a base coat of paint and let it dry completely. |
| 3 | Apply a layer of crackle medium and let it dry partially. |
| 4 | Apply a top coat of paint and watch the crackle effect appear. |
Remember to experiment with different colors and techniques to create unique and interesting finishes. Have fun and enjoy the process of transforming your furniture with crackle medium.
Enhancing Details With Glazes and Antiquing
The application of glazes and antiquing techniques can greatly enhance the details of our furniture, giving them a beautifully aged and textured appearance. By utilizing these methods, we can transform ordinary pieces into unique and charming works of art.
Here are some key tips for mastering glazing techniques and antiquing methods:
-
Choose the right glaze: Experiment with different colors and consistencies to achieve the desired effect. A darker glaze will create depth and shadows, while a lighter one will highlight intricate details.
-
Apply strategically: Focus on areas that would naturally wear over time, such as corners, edges, and raised surfaces. Use a brush or cloth to apply the glaze, working it into the crevices and grain of the wood.
-
Seal the finish: Once the glaze has dried, seal it with a clear topcoat to protect the surface and add a subtle sheen. This will ensure that your furniture maintains its beautiful aged appearance for years to come.
With these glazing techniques and antiquing methods, you can breathe new life into your furniture and create pieces that tell a story of timeless beauty.
Protecting Your Finished Piece With a Topcoat
When it comes to protecting our finished piece, applying a topcoat is essential. Not only does it provide a protective barrier against wear and tear, but it also enhances the overall appearance of the piece.
Topcoat Application Techniques
We’ve found that applying two thin coats of topcoat gives the best results for protecting our finished piece. It not only adds a layer of protection but also enhances the overall look of the piece.
To achieve the desired natural aging effects, we’ve discovered some topcoat application techniques that work wonders. Here are a few tips to master distressed finishes:
- Use a brush or a rag to apply the topcoat. This allows for better control and ensures an even application.
- Apply the topcoat in long, smooth strokes, following the grain of the wood. This helps to create a seamless finish and avoids any streaks or brush marks.
- Allow each coat of topcoat to dry completely before applying the next one. This ensures that the layers bond together effectively and provides a durable finish.
Benefits of Using Topcoat
To maximize the longevity of our finished piece, we’ve found that using topcoat not only provides protection but also enhances its overall appearance. Applying a topcoat offers numerous benefits such as increased durability, resistance to stains and scratches, and a beautiful, glossy finish. It acts as a protective barrier, guarding the surface against moisture, UV rays, and daily wear and tear. Additionally, topcoat application techniques can vary depending on the desired effect. For a smooth and seamless finish, we recommend applying the topcoat with a foam brush or a sprayer. However, if you’re looking to achieve a distressed or aged look, you can use a dry brush or sandpaper to lightly distress the topcoat. Experimenting with different techniques and finishes can add depth and character to your piece, making it truly unique.
| Benefits of Topcoat | Topcoat Application Techniques |
|---|---|
| Increased durability | Apply with foam brush or sprayer |
| Resistance to stains and scratches | Use dry brush or sandpaper for distressed look |
| Beautiful, glossy finish | Experiment with different techniques |
Troubleshooting Common Distressing Challenges
We’re here to address the frustrating obstacles that can arise when working with distressed finishes. Distressing furniture or other items can be a great way to achieve a vintage or rustic look, but it’s not always smooth sailing. Here are some key tips to help you troubleshoot common distressing challenges:
-
Troubleshooting uneven distressing: Uneven distressing can be a common issue, but there are a few things you can do to fix it. One option is to lightly sand the areas that are too heavily distressed to even out the appearance. Another option is to add more distressing to the areas that are too lightly distressed, using techniques like sanding, scraping, or even using a hammer to create dents and dings.
-
Avoiding over distressing: Over distressing can happen when you get carried away with the distressing process, resulting in a piece that looks overly worn and damaged. To avoid this, start with a light hand and gradually build up the distressing until you achieve the desired look. It’s always easier to add more distressing than to remove it, so take it slow and step back to assess the piece as you go.
-
Experiment and have fun: Distressing is an art form, and there’s no right or wrong way to do it. Don’t be afraid to experiment with different techniques and tools to achieve unique and interesting distressed finishes. Remember, it’s all about creating a look that speaks to your personal style and vision.
Frequently Asked Questions
Can I Distress Furniture Without Using Paint?
Yes, you can distress furniture without using paint! There are alternative methods for achieving a distressed look.
Some popular techniques include sanding, staining, and using a wax or glaze. Sanding can create a worn appearance by removing layers of finish. Staining can add depth and age to the wood. Using a wax or glaze can highlight the natural grain and create an antique effect.
These techniques offer unique ways to distress furniture without relying on paint.
How Can I Distress Metal Surfaces?
When it comes to distressing metal surfaces, there are various techniques you can use to achieve that desired worn and vintage look.
One interesting statistic is that distressing techniques can actually increase the value of antique metal pieces by up to 25%.
From using sandpaper and wire brushes to creating rust effects with vinegar and salt, there are endless possibilities to explore.
Mastering these techniques will allow us to transform any metal surface into a beautifully distressed masterpiece.
Can I Distress Outdoor Furniture?
Distressing outdoor furniture involves applying various techniques to create a worn, aged look. Some popular methods include sanding, scraping, and using paint or stain to mimic natural wear and tear.
However, it’s important to consider the pros and cons of distressing outdoor furniture. On the positive side, distressing can add character and charm to your furniture. On the downside, it may reduce its durability and longevity.
Careful consideration should be given to ensure the best results.
What Is the Best Way to Distress a Glossy Surface?
Distressing a glossy surface can be a challenge, but there are some effective techniques to achieve the desired look. When distressing glass surfaces, using sandpaper or a glass etching cream can create beautiful, weathered effects.
For plastic surfaces, sanding with fine grit sandpaper or using a heat gun can help achieve a distressed finish.
It’s important to experiment with different techniques and find what works best for your specific project.
Are There Any Safety Precautions I Should Take When Distressing Furniture?
When distressing furniture, it’s important to prioritize safety measures. We always make sure to take the necessary precautions to protect ourselves.
Wearing protective gear such as goggles and gloves is crucial to avoid any potential injuries. Additionally, we ensure proper ventilation in the workspace to prevent inhaling any harmful fumes.
Conclusion
In conclusion, mastering distressed finishes is like uncovering hidden treasures within your furniture. With the right paint colors, tools, and techniques, you can transform any piece into a work of art with authentic wear and tear.
By incorporating crackle medium and enhancing details with glazes, you can create a beautifully aged effect. Don’t forget to protect your finished piece with a topcoat to ensure its longevity.
So grab your brushes and let your creativity flow as you embark on this artistic journey.