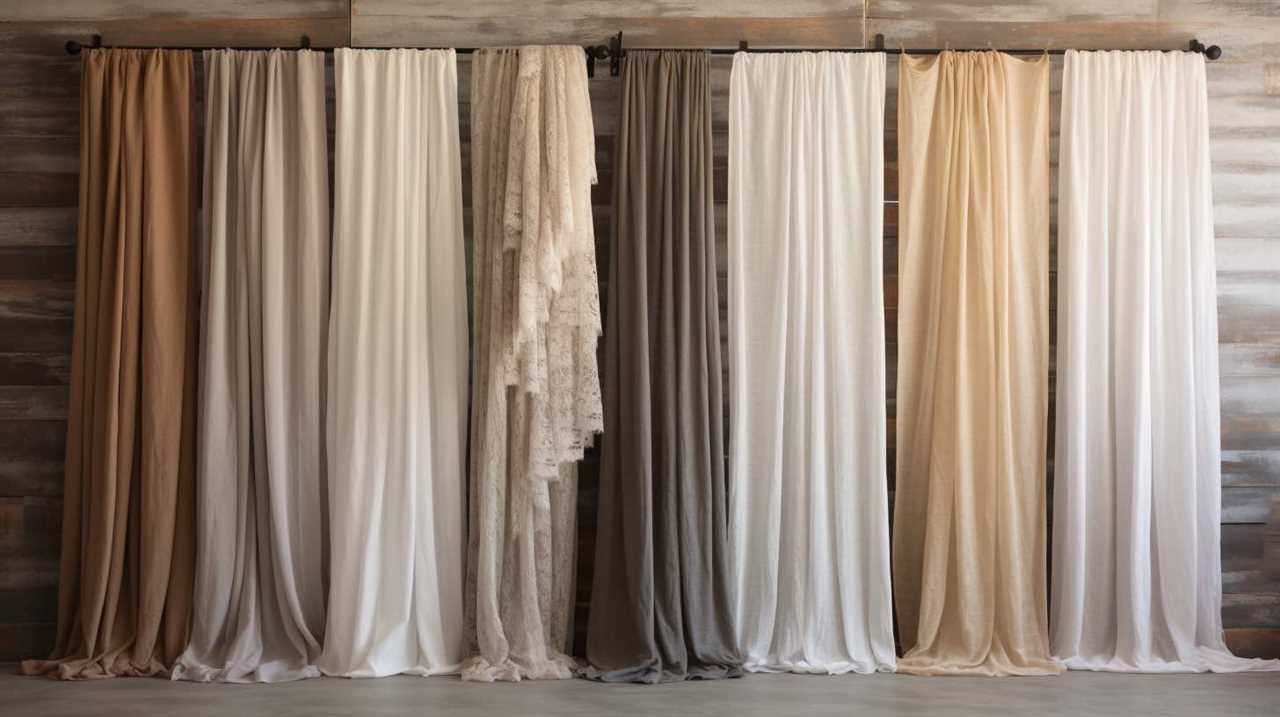
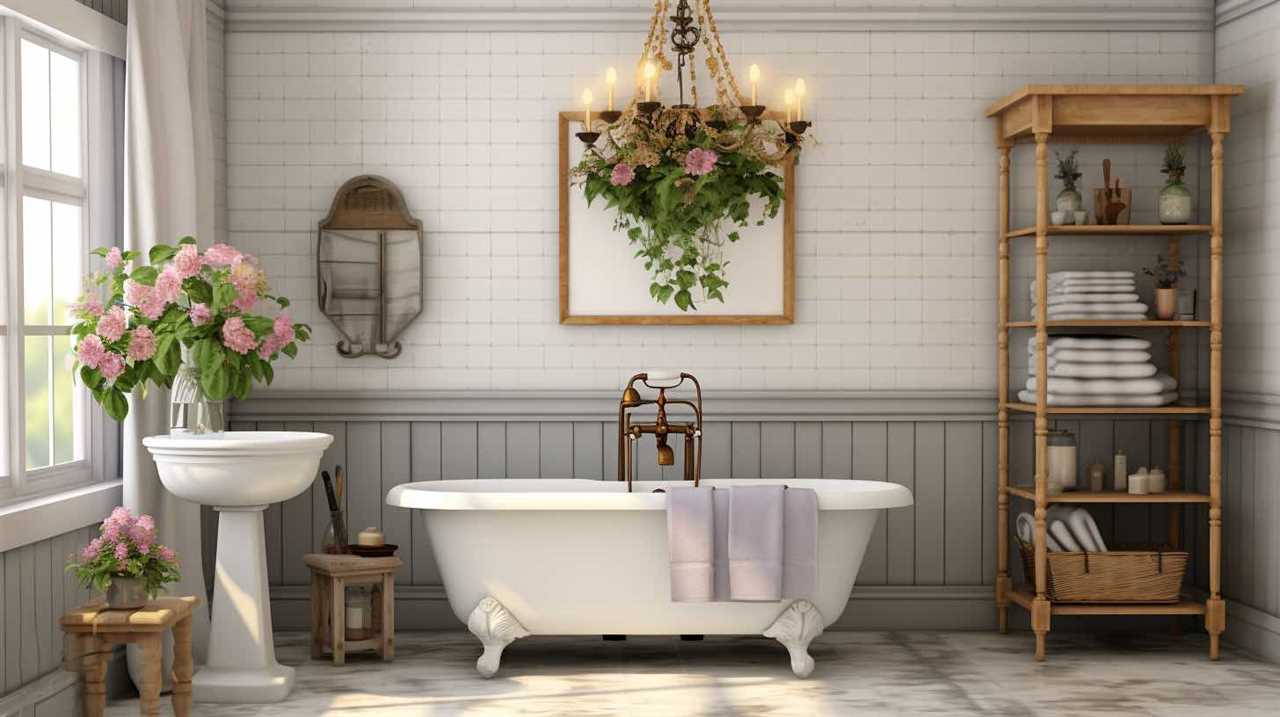
Presenting our manual on 10 easy DIY tasks to attain a rustic farmhouse appearance.
We’ve curated a list of creative and practical ideas that will transform your home into a cozy haven.
From a rustic wooden picture frame to a charming mason jar centerpiece, these projects will add a touch of vintage charm to any space.
Get ready to roll up your sleeves and unleash your inner DIY enthusiast as we take you on a journey to create the farmhouse of your dreams.
Let’s get started!
Key Takeaways
- DIY Rustic Picture Frames and Centerpieces: Learn how to create personalized farmhouse decor with DIY rustic picture frames and centerpieces using techniques like wood staining, chicken wire mesh, burlap matting, and vintage jars.
- Creative Uses for Mason Jars: Discover various ways to repurpose mason jars, such as transforming them into candleholders, kitchen canisters, herb planters, and rustic flower vases, to incorporate versatile jars into farmhouse decor.
- Distressed Farmhouse Sign and Lettering Ideas: Explore the art of creating charming and rustic distressed signs using wood with distinct grain patterns and reclaimed wood, along with unique lettering techniques like brush lettering, faux calligraphy, embellished lettering, and watercolor lettering.
- DIY Furniture Projects: Learn how to make a DIY barn door headboard using materials like a barn door, plywood, screws, and paint or stain, as well as an upcycled pallet coffee table by disassembling pallets and adding legs. These projects are not only cost-effective but also contribute to sustainable living.
GUTINNEEN Large Chicken Coop with All Around Metal Frame Mobile Hen House with Wheels Weatherproof Duck House with Nesting Box, Outdoor Run, Perch, Leakproof Tray for 6-8 Chickens 85" L
Spacious Coop for 6-8 Hens: Measuring 85.59"L x 48.2"W x 48.2"H, this large chicken coop provides plenty of...
As an affiliate, we earn on qualifying purchases.
Rustic Wooden Picture Frame
We love crafting a rustic wooden picture frame to add a touch of charm to our farmhouse decor. Wood staining techniques are essential in achieving the perfect rustic look for our frames. One technique we enjoy using is called weathering. This involves creating a distressed effect on the wood to give it an aged appearance. We achieve this by using sandpaper to roughen the surface and then applying a wood stain in a darker shade. This brings out the natural grain of the wood and adds character to our frames.
Another technique we love is whitewashing. This involves applying a white paint or stain to the wood and then wiping it off, leaving behind a subtle, worn-out look. It gives our frames a vintage feel and pairs beautifully with our farmhouse decor.
When it comes to rustic photo display ideas, we like to get creative. One idea is to attach a chicken wire mesh to the back of the frame, creating a unique way to display Polaroids or other small photos. Another idea is to add a burlap or fabric matting inside the frame, giving it a cozy and textured look.
Crafting rustic wooden picture frames isn’t only a fun DIY project but also a great way to personalize our farmhouse decor. With the right wood staining techniques and creative photo display ideas, we can create beautiful and unique frames that add a touch of rustic charm to our home.

PETS TUFF Chicken Chalet - Chicken Coop for Chickens, Ducks, Rabbits & More - Predator-Resistant, Strong Wire with Mesh Bottom - Wheels for Easy Moving - Wind & Snow Durable Chicken Pen - 124”x81”x79”
SECURE AND SAFE COOP: PetsTuff Chicken Run is designed to keep your animals secure and protected. The chicken...
As an affiliate, we earn on qualifying purchases.
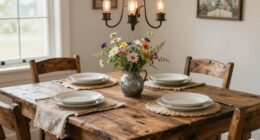
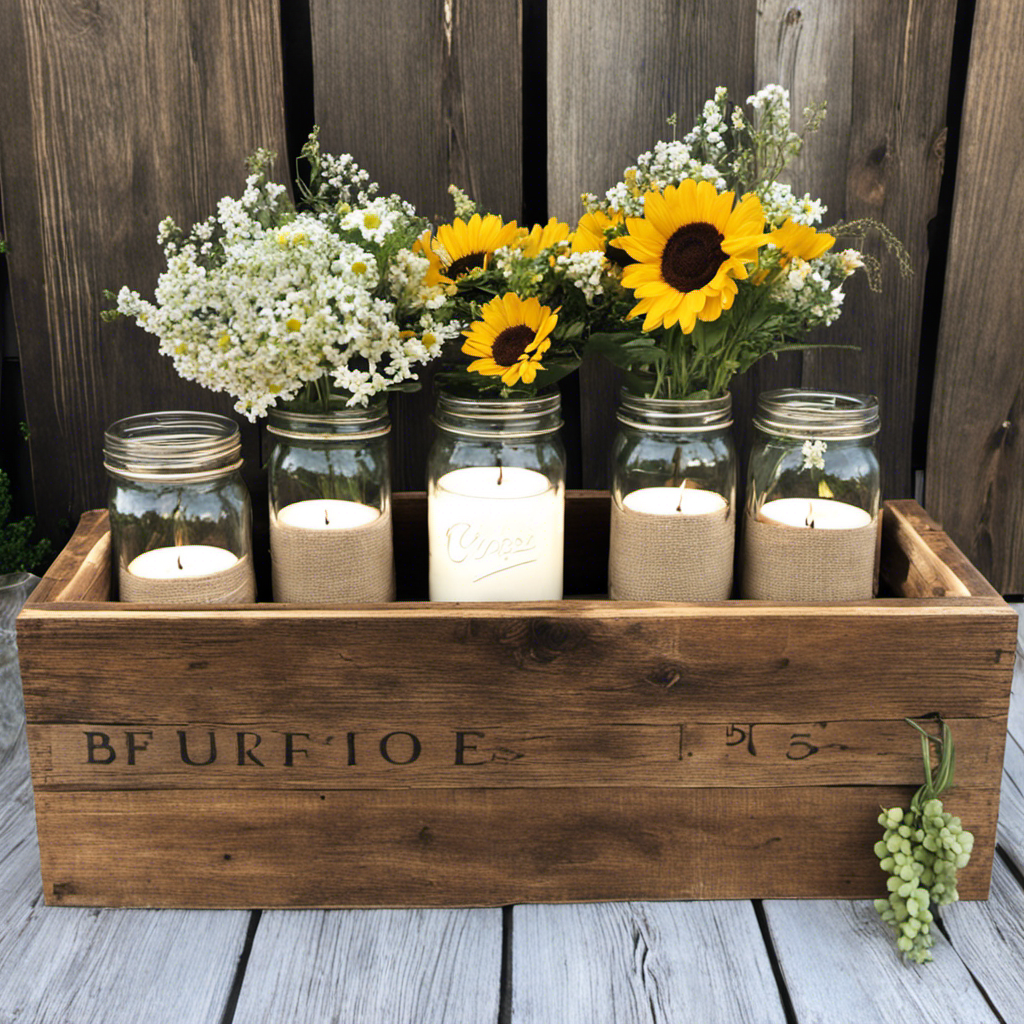
Vintage Mason Jar Centerpiece
Looking to add some rustic charm to your home decor?
A vintage mason jar centerpiece is the perfect DIY project for you.
With just a few simple steps, you can create a stunning centerpiece that will add a touch of farmhouse elegance to any room.
From mason jar vase alternatives to farmhouse centerpiece variations and rustic jar decorating ideas, the possibilities are endless when it comes to creating a unique vintage mason jar centerpiece.
Mason Jar Vase Alternatives
An antique milk bottle can be a charming alternative to a mason jar vase for our rustic farmhouse centerpiece.
While mason jar candle holders have been a popular choice for creating farmhouse table centerpieces, using a vintage milk bottle adds a unique touch to the overall aesthetic.
The milk bottle’s classic design and nostalgic feel evoke a sense of simplicity and authenticity that perfectly complements the rustic farmhouse decor.
Fill the milk bottle with freshly picked wildflowers or a bouquet of dried lavender to create a stunning centerpiece that brings a touch of nature indoors.
The milk bottle’s wider opening also allows for more creativity when arranging flowers, giving you the opportunity to create a truly personalized centerpiece.
Now, let’s explore some other variations of farmhouse centerpieces that will elevate the charm of your home.
Farmhouse Centerpiece Variations
Sometimes, we like to incorporate a vintage mason jar centerpiece into our farmhouse decor for a touch of nostalgia. However, there are many other variations of farmhouse centerpieces that can add charm and character to our table settings.
From simple floral arrangements in rustic containers to repurposed wooden crates filled with seasonal fruits and vegetables, the possibilities are endless. These DIY projects not only enhance the overall aesthetic of our farmhouse, but also allow us to showcase our creativity and personal style.
In addition to farmhouse table settings, farmhouse kitchen organization is another important aspect of creating an authentic rustic look. We can use vintage baskets and jars to store utensils, spices, and other kitchen essentials, adding both functionality and charm to our farmhouse kitchen.
Rustic Jar Decorating Ideas
We love finding new ways to decorate with rustic jars in our farmhouse, like using vintage mason jars as centerpieces. Here are four creative ideas to inspire you:
-
Rustic Jar Candleholders: Transform your mason jars into charming candleholders. Simply place a candle inside the jar and secure it with some twine or ribbon for a rustic touch. The soft glow of the candle will create a cozy atmosphere in any room.
-
Farmhouse Kitchen Canisters: Give your kitchen a farmhouse feel by repurposing mason jars as stylish canisters. Fill them with flour, sugar, coffee, or any other pantry staples. Add some labels or chalkboard paint to personalize them and create a vintage look.
-
Herb Planters: Bring some greenery into your farmhouse by using mason jars as herb planters. Plant your favorite herbs, such as basil, rosemary, or mint, and place them on your kitchen windowsill. Not only will they add a fresh touch to your space, but they’ll also provide you with fresh herbs for cooking.
-
Flower Vases: Use mason jars as rustic flower vases to add a natural and beautiful touch to your farmhouse decor. Whether you gather wildflowers from your garden or pick up a bouquet from the local market, these vases will showcase the beauty of the blooms.
With these rustic jar decorating ideas, you can easily create a charming farmhouse atmosphere in your home. Get creative and have fun exploring different ways to incorporate these versatile jars into your decor.
Aoxun Large Metal Chicken Coop, Outdoor Chicken Runs for Yard with Cover, Spire Roof Hen House Enclosure with Security Lock, Walk-in Cage Peak Hen House for Yard Farm (10x20x6.4 FT)
【Premium Rust-Proof Galvanized Frame】Crafted with 1-inch diameter, heavy-gauge steel tubes and hot-dip galvanizing, this sturdy metal chicken coop...
As an affiliate, we earn on qualifying purchases.
Distressed Farmhouse Sign
We absolutely love the charming and rustic look of a distressed farmhouse sign. It adds so much character to any space and is a perfect DIY project for those who want to create a cozy farmhouse vibe.
In order to create the perfect distressed look, we’ll share some wood selection tips, explain different distressing techniques, and provide creative ideas for lettering that will make your farmhouse sign truly unique.
Let’s get started and bring a touch of vintage charm to your home!
Wood Selection Tips
One of the most important wood selection tips for creating a distressed farmhouse sign is choosing at least three different types of wood to add texture and depth to the piece.
Here are four key considerations when selecting wood for your rustic project:
-
Grain pattern: Look for woods with distinct and prominent grain patterns, such as oak or pine, to enhance the rustic charm of your farmhouse sign.
-
Weathered appearance: Opt for reclaimed or salvaged wood to achieve an authentic aged look. This can be obtained from old barns, pallets, or even driftwood.
-
Distinct colors: Mix different wood species with varying natural colors to create visual interest and contrast. Consider using woods like cedar, walnut, or cherry for their unique hues.
-
Durability: Ensure the selected woods are sturdy enough to withstand distressing techniques, such as sanding and staining. Hardwoods like maple and mahogany are great options for their strength and resilience.
Distressing Techniques Explained
Let’s dive into the various distressing techniques used to achieve that classic, weathered look on our farmhouse sign. When it comes to creating texture and character on our wooden signs, there are a few tried and true methods that can give us that perfect rustic aesthetic. By using texture painting techniques and distressing tools, we can transform a plain piece of wood into a charming farmhouse sign.
Here are some popular distressing techniques that you can try:
| Technique | Description | Tools Required |
|---|---|---|
| Sanding | Smooths the wood surface and creates a worn look | Sandpaper |
| Hammering | Adds dents and dings to mimic natural wear and tear | Hammer |
| Staining | Enhances the wood grain and adds depth to the overall look | Stain and brush |
Creative Lettering Ideas
As we explore creative lettering ideas for our distressed farmhouse sign, it’s important to consider different styles and techniques that can add a unique touch to our rustic decor. Here are four hand lettering techniques that can provide calligraphy inspiration for our project:
-
Brush Lettering: This technique involves using a brush pen to create flowing, thick and thin lines, giving a modern yet elegant look.
-
Faux Calligraphy: A great option for beginners, this technique involves creating the illusion of calligraphy by thickening certain lines after writing with a regular pen.
-
Embellished Lettering: This technique adds decorative elements like flourishes, loops, and curls to make the letters more visually appealing and artistic.
-
Watercolor Lettering: By using watercolor paints and a brush, we can achieve a soft and dreamy effect, perfect for a farmhouse-inspired sign.
Large Metal Chicken Coop with Hexagonal Chicken Wire, Chicken Coop Run Pen for Yard with Waterproof Cover, Outdoor Large Walk-in Chicken Coops for 8 Chickens Duck Pen House Cage Run
【Sturdy PVC-coated Wire Mesh】Guiferland chicken coop uses tightly-woven 1-inch PVC-coated hexagonal chicken wire mesh, offering rust-resistant durability for...
As an affiliate, we earn on qualifying purchases.
DIY Barn Door Headboard
We love how the DIY barn door headboard adds a rustic touch to our bedroom decor. It’s a simple and affordable project that can transform any ordinary bed into a statement piece. Not only does it bring a charming farmhouse vibe, but it also adds functionality by serving as a focal point and providing extra storage space.
To create your own barn door headboard, you will need a few basic materials and tools. Here’s a table to help you get started:
| Materials | Tools |
|---|---|
| Barn door | Saw |
| Plywood | Drill |
| Screws | Tape measure |
| Paint or stain | Sandpaper |
Begin by measuring the width of your bed to determine the size of your barn door. Cut the plywood to fit the measurements, and attach it to the barn door using screws. Sand the edges and surfaces to achieve a smooth finish. Then, you can either paint or stain the barn door to match your existing bedroom decor.
Once the barn door headboard is complete, simply mount it to the wall behind your bed using a drill and screws. The end result will be a stunning rustic headboard that adds character and warmth to your bedroom.
Upcycled Pallet Coffee Table
We can repurpose old pallets into a beautiful and functional coffee table for our living room. With some creativity and a few DIY skills, we can transform these discarded pallets into a unique piece of furniture that adds character to our home. Here are four ideas for creating creative pallet designs and repurposed furniture ideas:
-
Start by disassembling the pallets and sanding down the rough edges. This will give us a smooth surface to work with.
-
Use the pallet boards to build the base of the coffee table. We can arrange them in a geometric pattern or simply keep them aligned for a rustic look.
-
Add legs to the table using either repurposed furniture legs or wooden blocks. This will elevate the table and make it more functional.
-
Finish off the table by staining or painting it in a color that matches our existing decor. We can also add a protective coat to ensure longevity.
By repurposing old pallets, we not only save money but also contribute to sustainable living. Our coffee table will be a unique conversation piece and a testament to our creativity.
Now, let’s move on to the next project: rustic floating shelves.
Rustic Floating Shelves
Have you considered using salvaged wood to create rustic floating shelves, or would you prefer a different material for this project? When it comes to rustic shelf styling, salvaged wood adds a touch of warmth and character to any space. Not only does it contribute to a cozy farmhouse aesthetic, but it also allows you to repurpose old materials and reduce waste.
To help you visualize the possibilities, let’s take a look at a comparison between salvaged wood and other materials commonly used for floating shelves:
| Materials | Pros | Cons |
|---|---|---|
| Salvaged Wood | Adds rustic charm, eco-friendly | Requires more maintenance |
| Reclaimed Metal | Industrial look, durable | May be more expensive |
| Glass | Sleek and modern aesthetic | Fragile, frequent cleaning needed |
| Concrete | Sturdy and durable, industrial appeal | Heavy, difficult installation |
| Laminate | Affordable, easy to clean and maintain | Lacks the natural look of wood |
As you can see, salvaged wood offers a unique combination of rustic charm and eco-friendliness. However, it’s important to consider your personal preferences and the overall style of your space before making a decision.
Now that we have explored the possibilities for rustic floating shelves, let’s move on to another DIY project that will add a lovely touch to your farmhouse decor: the farmhouse wreath with burlap bow.
Farmhouse Wreath With Burlap Bow
We love adding a touch of rustic charm to our farmhouse decor, and one of our favorite DIY projects is creating a farmhouse wreath with a burlap bow.
The beauty of this project lies in the endless design variations you can explore, from using different types of greenery to incorporating seasonal elements.
When it comes to making the perfect burlap bow, remember to keep it simple and embrace the natural texture for an authentic farmhouse look.
Wreath Design Variations
Let’s explore different wreath design variations to add a touch of farmhouse charm to our rustic decor with a burlap bow. Creating wreaths is a fun and creative way to spruce up our homes. Here are four wreath design tips to inspire our next DIY project:
-
Rustic Grapevine Wreath: Use a grapevine wreath as the base and adorn it with dried flowers, twigs, and burlap ribbons for a natural and rustic look.
-
Floral Hoop Wreath: Opt for a modern twist by using a metal or wooden hoop as the base. Decorate it with an assortment of faux or dried flowers, greenery, and a burlap bow for a chic farmhouse vibe.
-
Mossy Monogram Wreath: Personalize your wreath by adding a moss-covered initial in the center. Surround it with delicate flowers, leaves, and a burlap bow for a charming touch.
-
Succulent Wreath: Create a living wreath by arranging different types of succulents on a moss or grapevine base. Finish it off with a burlap bow for a unique and eye-catching centerpiece.
Now that we’ve explored wreath design variations, let’s move on to some tips for bow-making.
Tips for Bow-Making
We can easily create charming burlap bows for our farmhouse wreaths by following these helpful tips.
When it comes to bow making supplies, it’s important to have the right materials on hand. Start with a roll of burlap ribbon, floral wire, and a pair of scissors.
To begin, cut a long piece of burlap ribbon and fold it into loops, securing the center with floral wire.
Next, fluff the loops and adjust the size and shape of the bow until it looks just right. Don’t be afraid to get creative with different bow making techniques, such as adding tails or incorporating other materials like twine or lace.
With a little practice, we can master the art of bow making and add a rustic touch to our wreaths.
Now, let’s move on to our next project: creating a mason jar soap dispenser.
Mason Jar Soap Dispenser
Using a mason jar for a soap dispenser adds a charming touch to our farmhouse decor. Here are four alternatives to consider when looking for farmhouse soap dispenser ideas:
-
Vintage Glass Bottles: Repurposing antique glass bottles as soap dispensers can bring a nostalgic feel to your farmhouse decor. Look for bottles with interesting shapes and designs to add a unique touch to your bathroom or kitchen.
-
Galvanized Metal Containers: For a more rustic look, consider using galvanized metal containers as soap dispensers. These containers can be found in various sizes and styles, such as buckets or watering cans, and can add an industrial farmhouse vibe to your space.
-
Mason Jar with a Pump: If you love the mason jar aesthetic but want a different style, try using a mason jar with a pump attachment. These pumps can be easily fitted onto the mason jar lid, giving you the convenience of a soap dispenser with a farmhouse twist.
-
Wooden Soap Dispenser: For a truly unique farmhouse soap dispenser, consider making your own wooden dispenser. Craft a wooden base with a hole for the soap bottle, and attach a pump or spout. This DIY project allows you to customize the dispenser to match your decor perfectly.
These alternative soap dispensers can add character and charm to your farmhouse decor, while still providing functionality. Get creative and find the perfect dispenser to complement your space!
DIY Farmhouse Blanket Ladder
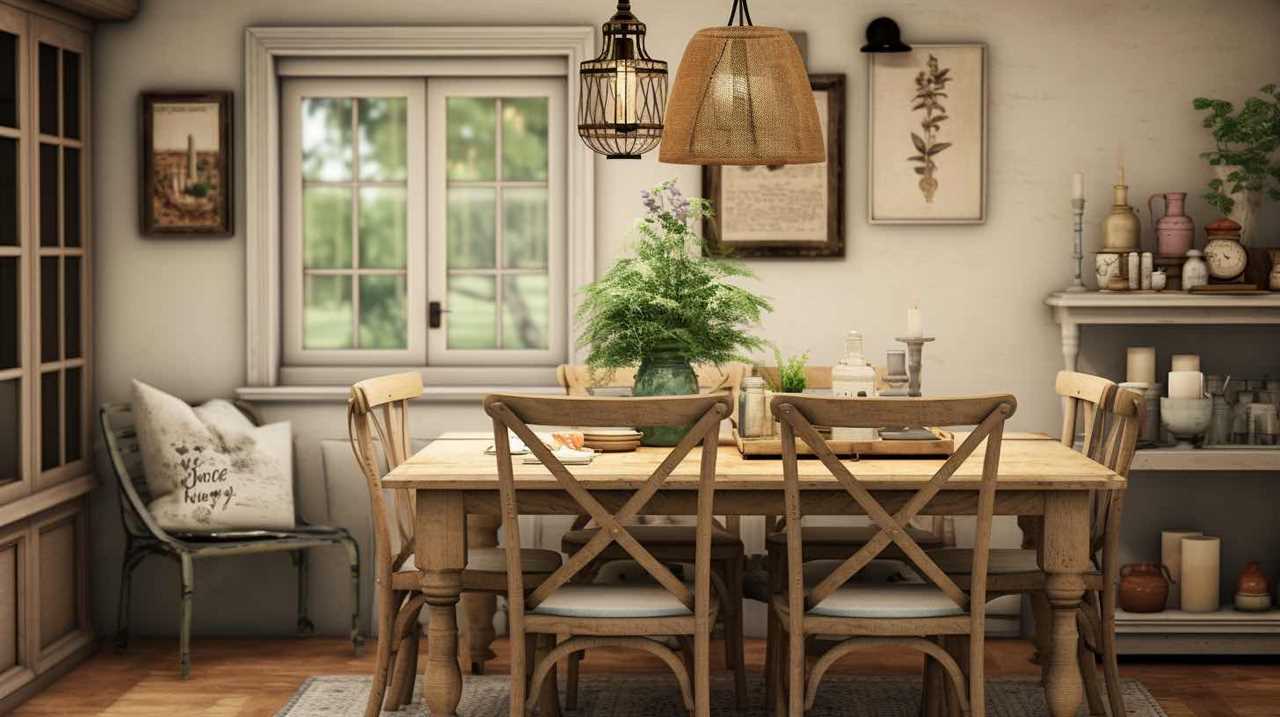
Our farmhouse decor is complete with a DIY blanket ladder that adds a cozy touch to our living room. It’s amazing how a simple ladder can transform the entire space and create a rustic and inviting atmosphere. Not only is it a functional piece for hanging blankets, but it also serves as a decorative element in our home.
To complement our DIY blanket ladder, we’ve also incorporated other farmhouse-inspired projects into our decor. One of our favorites is the DIY farmhouse candleholders. These candleholders add a warm and romantic ambiance to our space. We used reclaimed wood and mason jars to create a rustic and charming look. Placing them on our ladder shelf creates a beautiful focal point in the room.
Speaking of ladder shelves, we also decided to add one to our farmhouse decor. The rustic ladder shelf is a versatile piece that provides both storage and display options. We use it to showcase our favorite books, plants, and other decorative items. Its weathered wood finish adds a touch of nostalgia to our space.
Upcycled Window Pane Mirror
After searching for inspiration online, we decided to create an upcycled window pane mirror by repurposing old windows and adding a coat of paint. Upcycled window pane crafts are a popular trend in farmhouse decor, and we wanted to incorporate this rustic look into our home.
Here’s how we transformed our old windows into a beautiful mirror:
-
Gather Materials:
- We started by collecting old windows from thrift stores and salvage yards.
- We made sure the windows were in good condition and had enough panes for our mirror design.
- Additionally, we gathered sandpaper, paint, a paintbrush, a mirror, and adhesive.
-
Prep the Windows:
- We carefully removed any existing hardware and cleaned the windows thoroughly.
- Then, we lightly sanded the surfaces to create a smooth base for painting.
-
Apply Paint:
- Using a paintbrush, we applied a coat of paint in our desired color.
- We opted for a distressed look by lightly sanding the edges after the paint had dried.
-
Attach the Mirror:
- Once the paint had fully dried, we adhered a mirror to the back of the window using a strong adhesive.
- We made sure the mirror was centered and secured it in place.
Frequently Asked Questions
What Are Some Alternative Materials That Can Be Used for the Rustic Wooden Picture Frame?
Well, when it comes to alternative materials for rustic wooden picture frames, there are actually quite a few options to choose from.
You might consider using reclaimed barn wood, which adds a unique touch of history to your decor.
Another option is using pallet wood, which can give your frames a rustic and weathered look.
And don’t forget about driftwood! It can bring a beachy and natural vibe to your farmhouse decor.
How Can I Add a Personal Touch to the Vintage Mason Jar Centerpiece?
We’ve got some great ideas on how to add a personal touch to your vintage mason jar centerpiece!
One idea is to incorporate fresh flowers into the arrangement. You can choose flowers that complement the colors of your farmhouse decor or go for a more rustic wildflower look.
Another unique way to personalize the centerpiece is to add customized labels or tags to each jar, featuring names, dates, or special messages.
These little details will make your centerpiece truly one-of-a-kind!
Can I Use a Different Type of Wood for the DIY Barn Door Headboard?
Yes, you can definitely use a different type of wood for the DIY barn door headboard. There are several alternative materials you can consider, such as reclaimed wood or even plywood. Just make sure to select a wood that matches the rustic farmhouse aesthetic you’re going for.
Additionally, when staining and sealing rustic wooden picture frames, it’s important to choose the right stain color and apply multiple coats of sealant for a durable and long-lasting finish.
What Are Some Creative Ways to Display Items on the Rustic Floating Shelves?
There are many creative ways to style rustic floating shelves and arrange items on farmhouse floating shelves.
One idea is to use a mix of decorative and functional items, such as plants, books, and vintage trinkets.
Another unique approach is to create themed displays, like a collection of antique cameras or a display of seashells and driftwood for a coastal vibe.
Additionally, you can experiment with different heights and textures to add visual interest to your shelves.
Are There Any Additional Steps Required to Make the Farmhouse Wreath With Burlap Bow Weather-Resistant?
To protect the farmhouse wreath from weather damage, there are a few additional steps you can take.
First, consider using a weather-resistant spray sealant on the wreath itself. This will help protect it from rain and sun exposure.
As for the burlap bow, while burlap is a popular choice for a rustic look, you can definitely use a different fabric that’s more weather-resistant, such as outdoor fabric or a synthetic material. Just make sure it matches the overall aesthetic of your farmhouse decor.
Conclusion
In conclusion, these 10 easy DIY projects for a rustic farmhouse decor are perfect for adding charm and character to your home.
With just a few simple materials and some creativity, you can create beautiful and unique pieces that will enhance your farmhouse style.
So why wait? Start working on these projects today and transform your space into a cozy and inviting farmhouse haven.
Who knew DIY could be so much fun and rewarding?